art final
An Ork Bust, and Trying Some New Things
Notes from painting an Ork bust by Escuig Miniatures. Trying out a new process of light studies first, leaning into visible brushwork, and seeing what happens.

This is an Ork bust by Escuig Miniatures that I finished a few days ago. I wanted to write about it because I tried a couple things on this one that I’m still thinking about.
The two things were: planning the lighting before I started painting, and letting my brush strokes show instead of hiding them.
Neither is a new idea. Painters way better than me have been doing both for years. But they’re both things I’ve been avoiding without realizing it, and I wanted to see what would happen if I leaned into them.
The Light Study
I’ve been seeing some painters in my feed lately who clearly think about light the way illustrators do. Not just “where’s the zenithal coming from” but actually composing the lighting before they pick up a brush. That stuck with me because I’ve got an illustration background and I’ve been ignoring it.
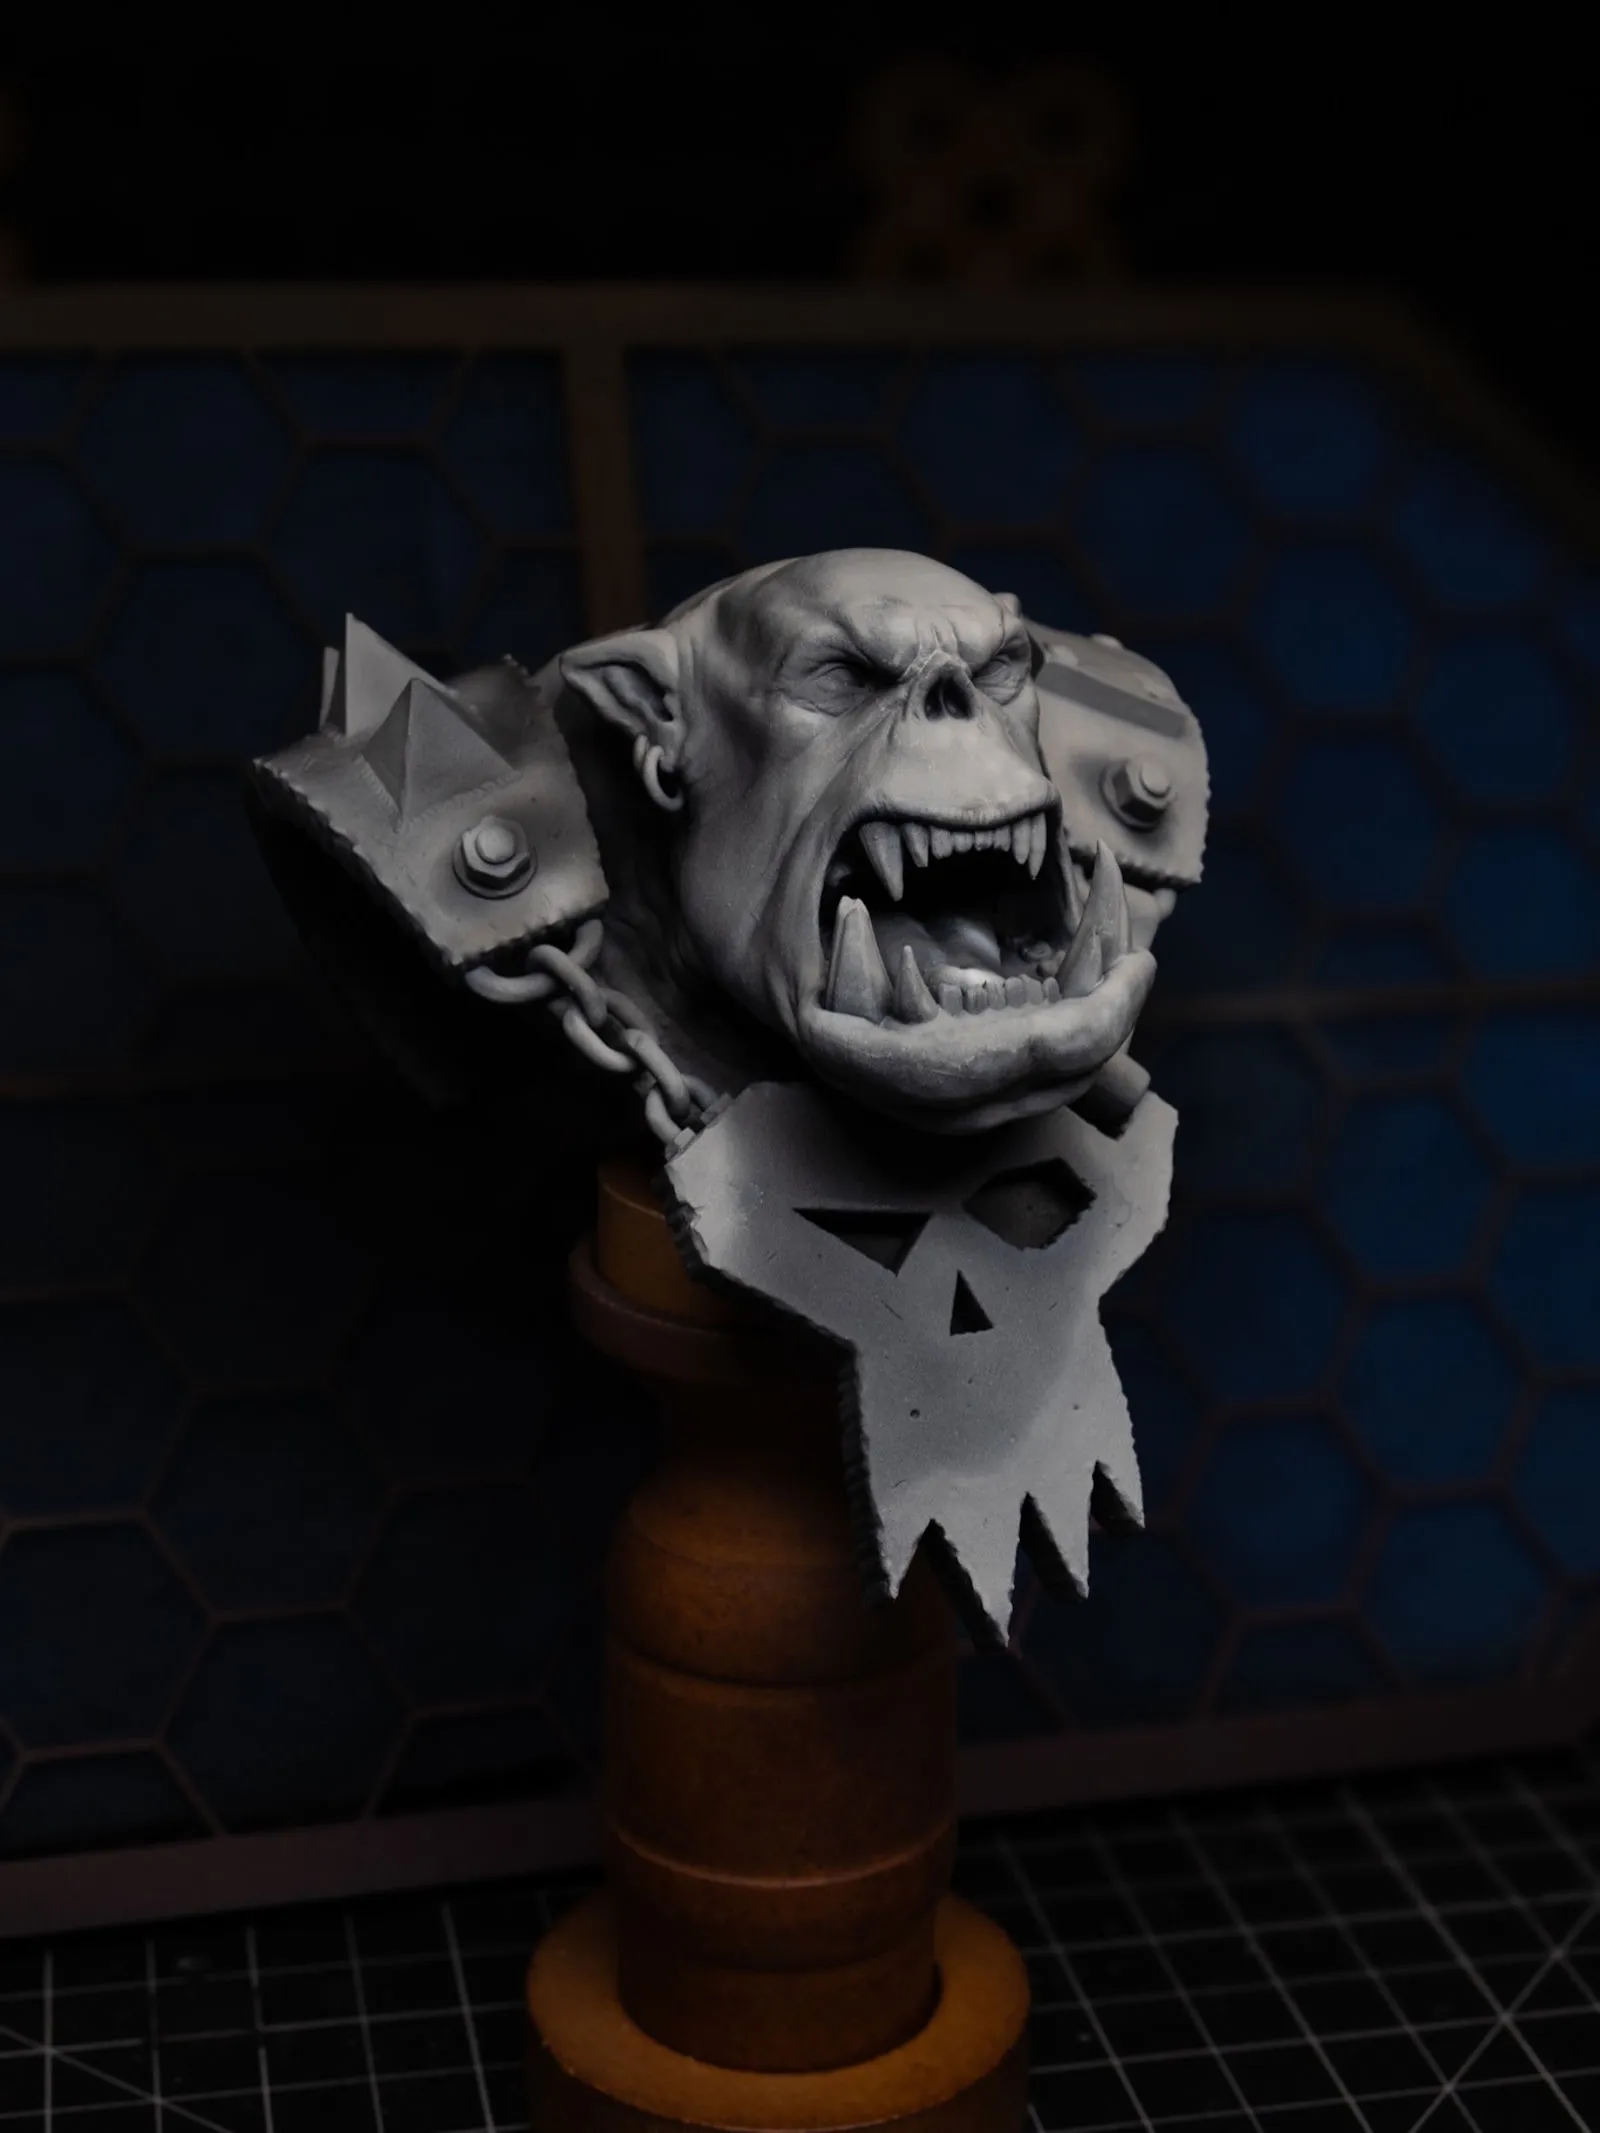
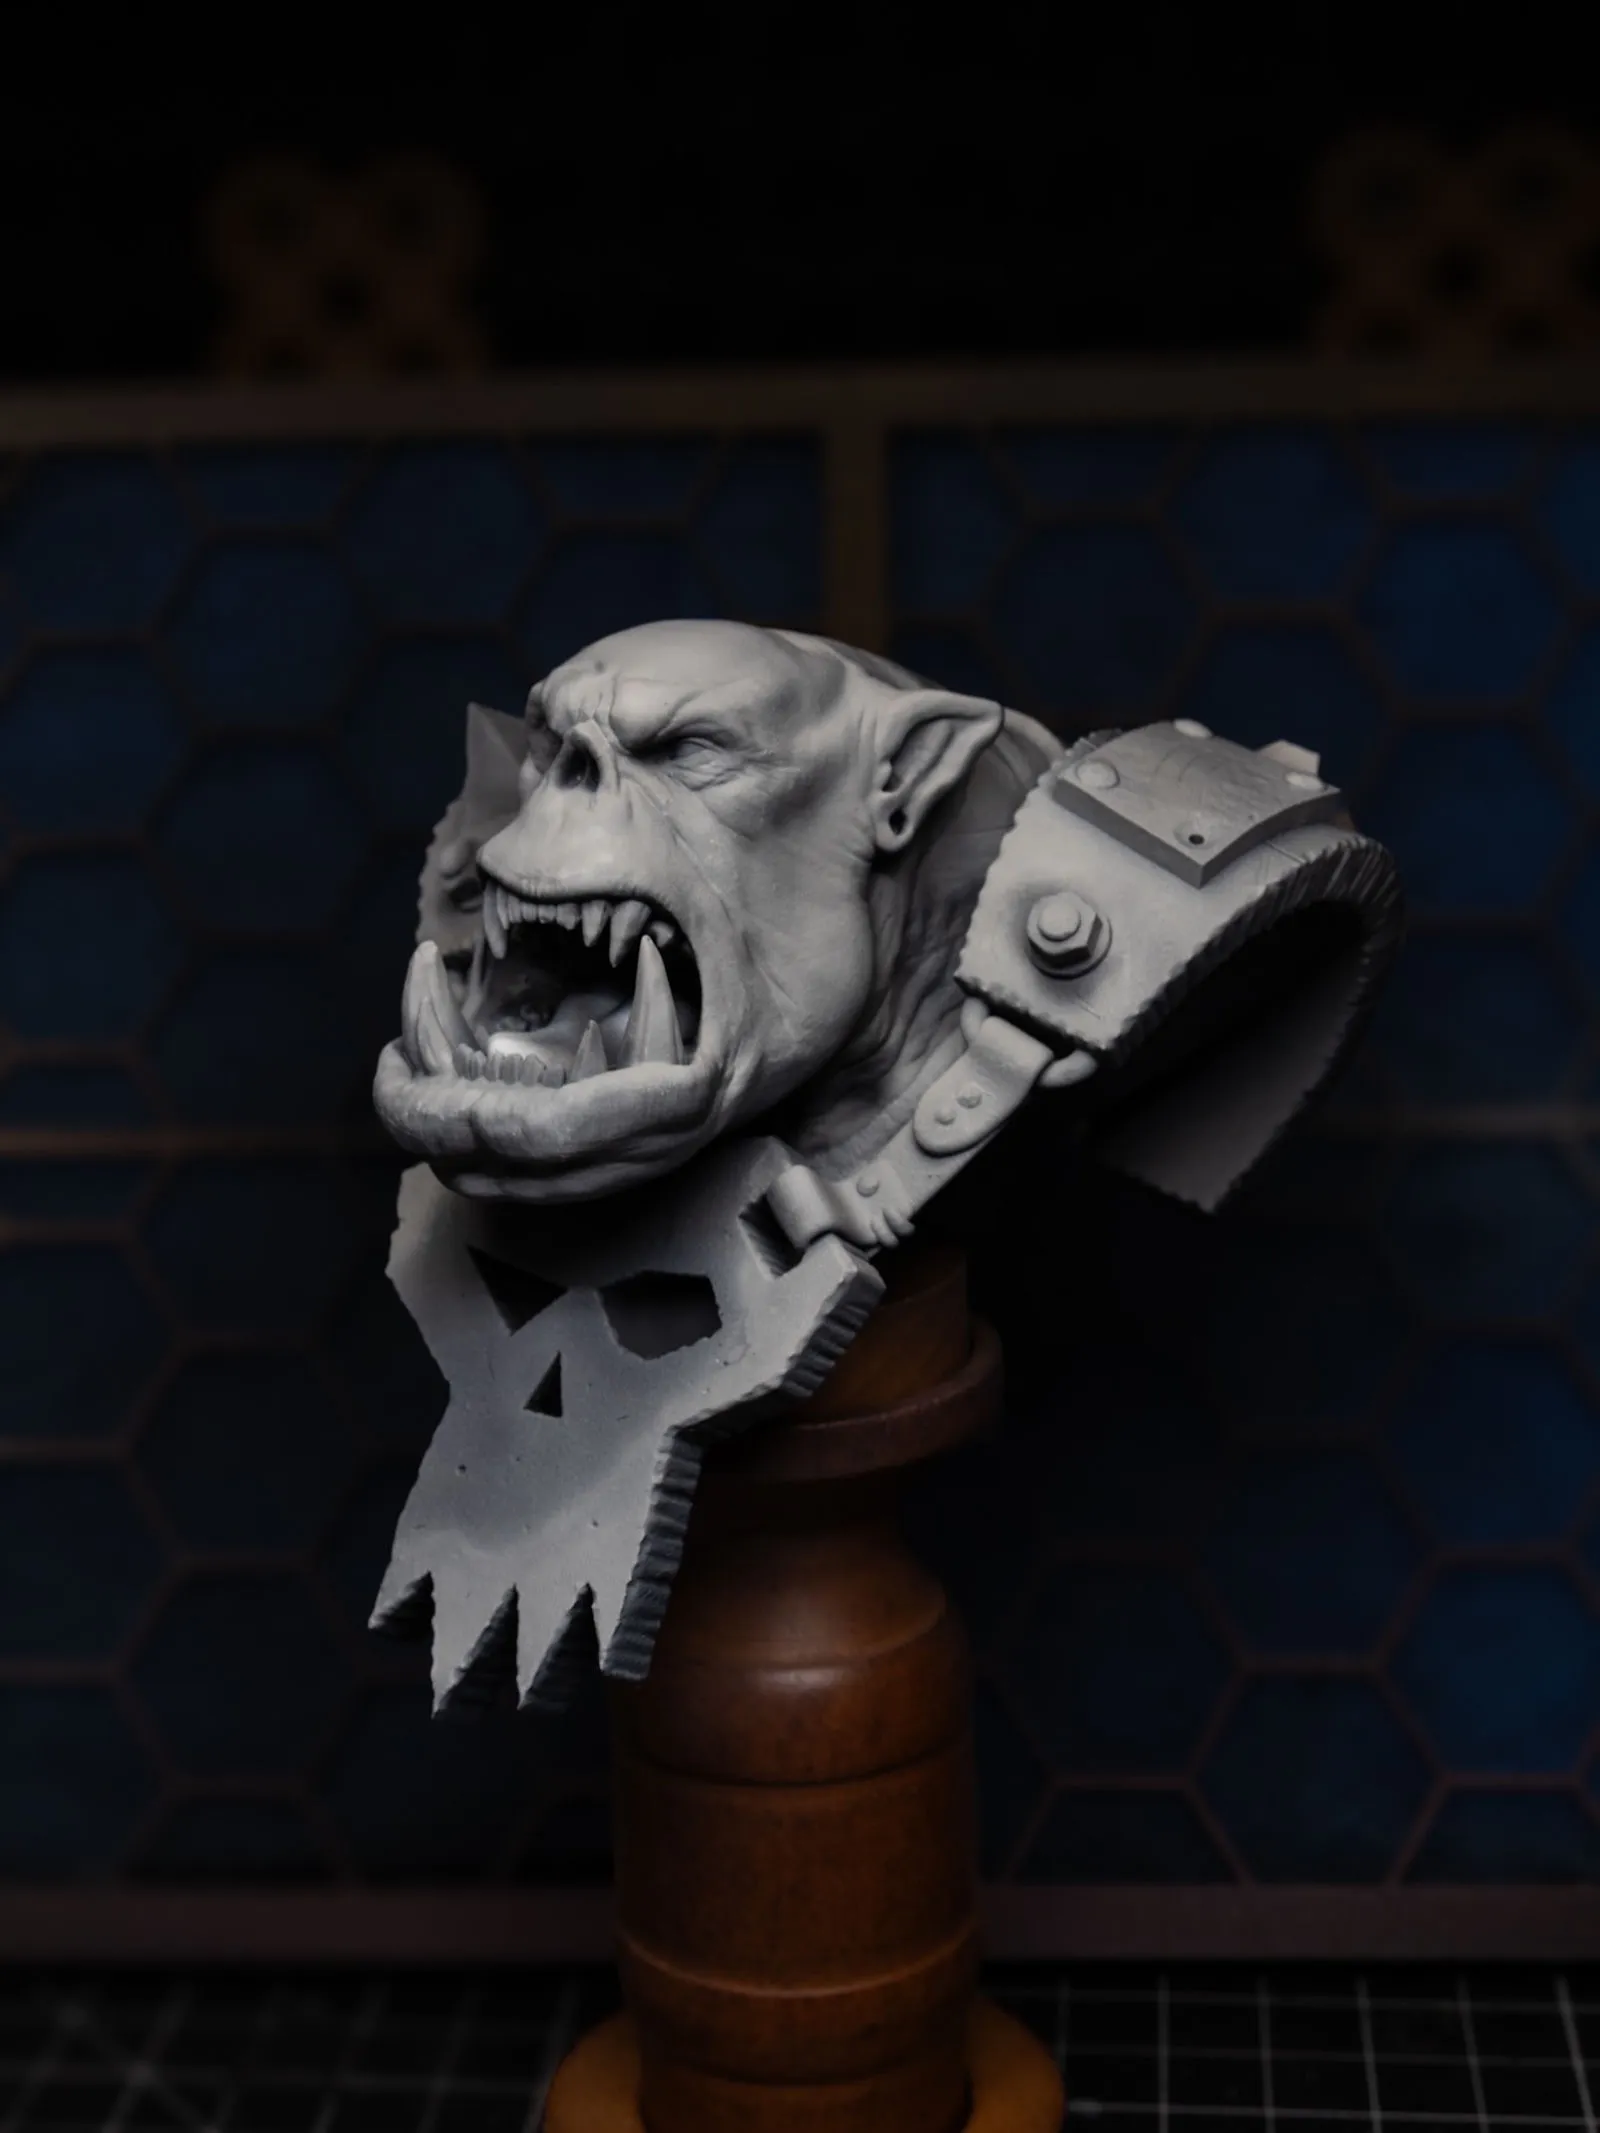
So before I painted anything on this Ork, I primed him black and photographed him under different lighting setups. Just played with where the light came from, how hard or soft it was, what fell into shadow.
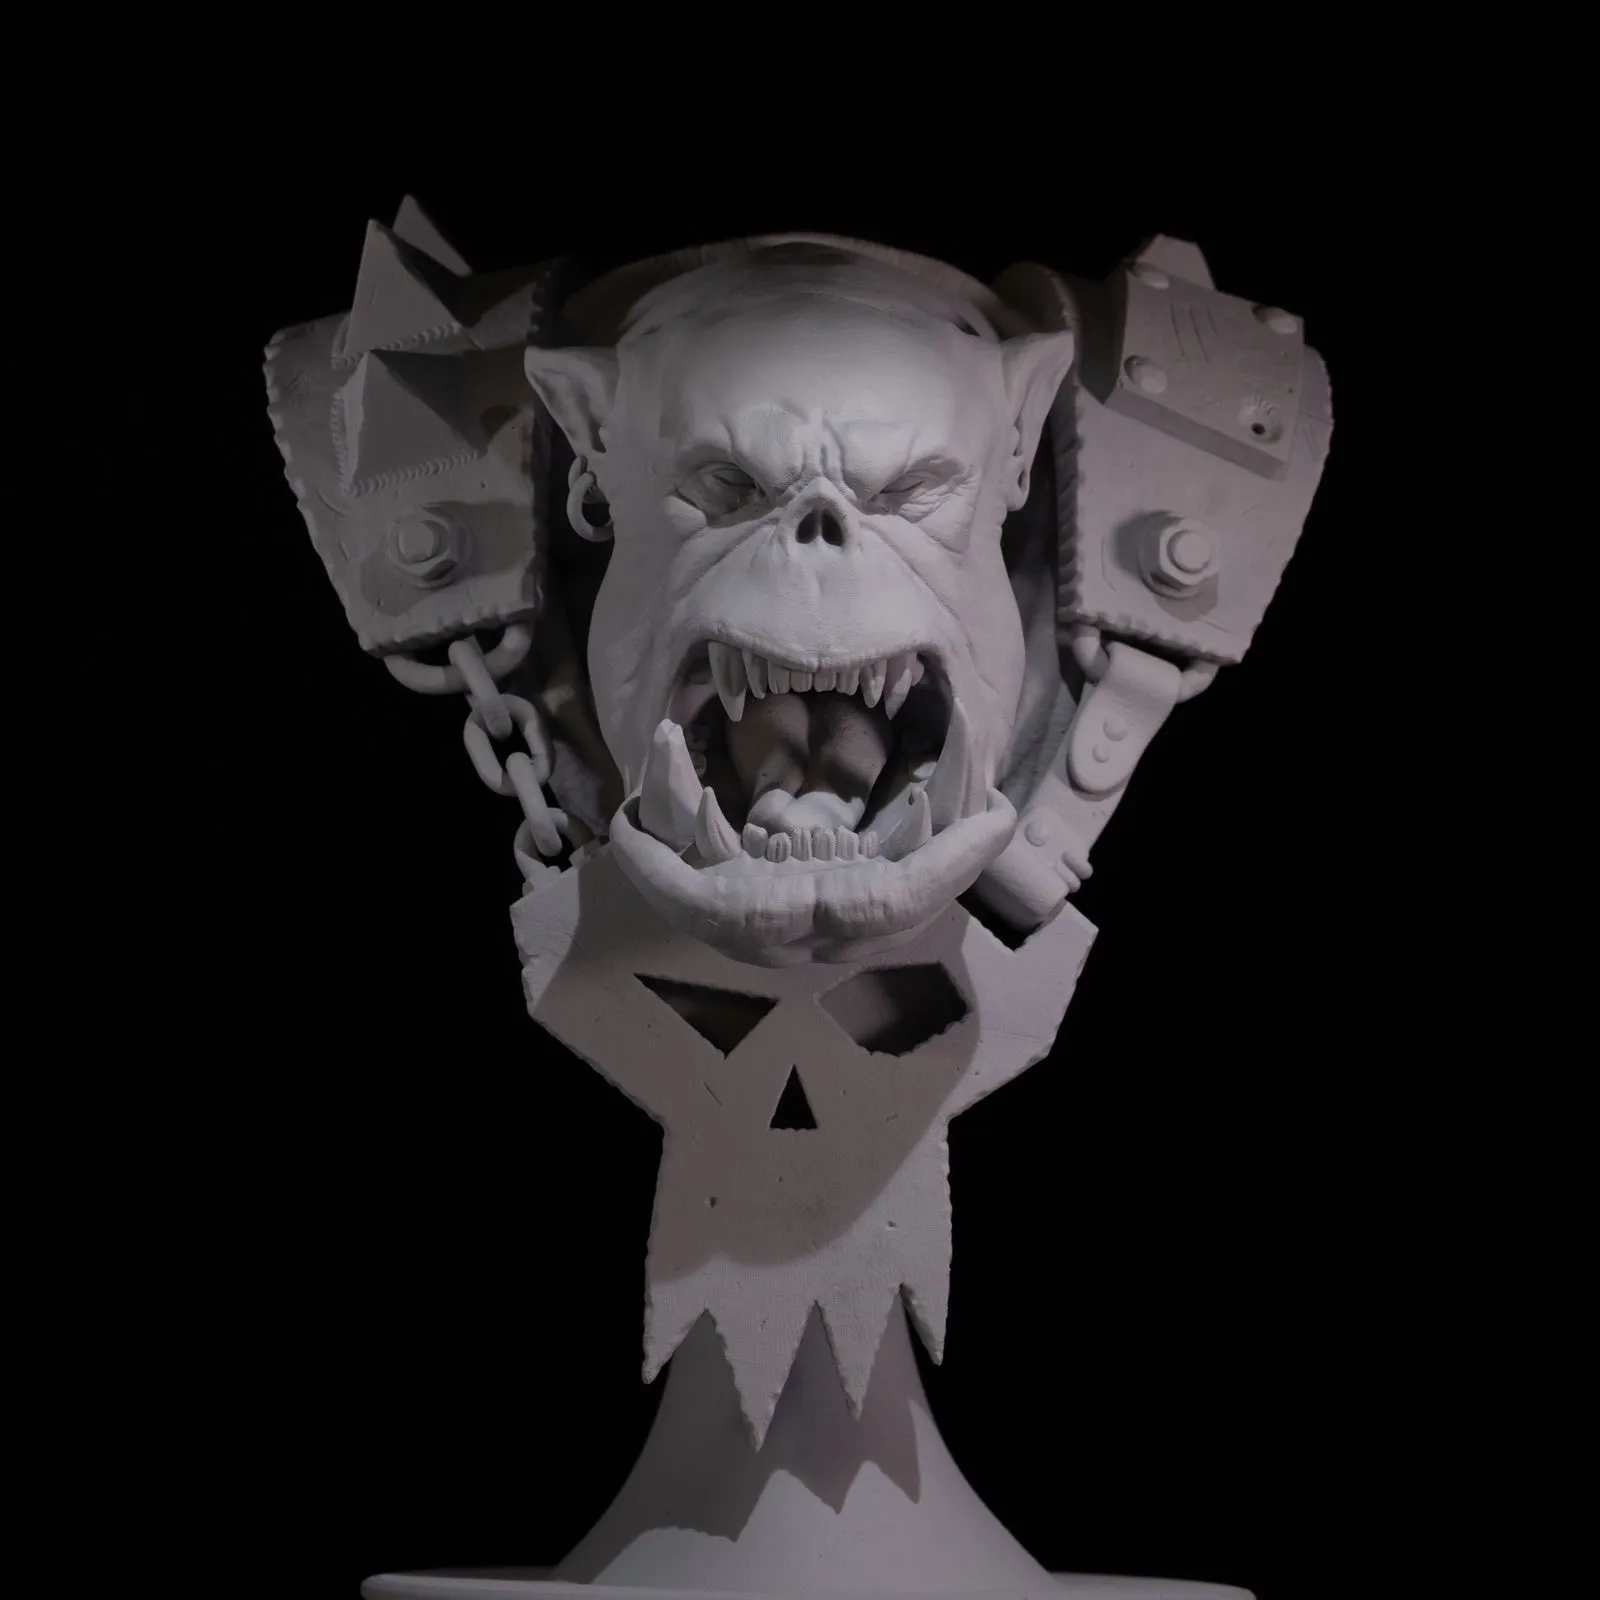
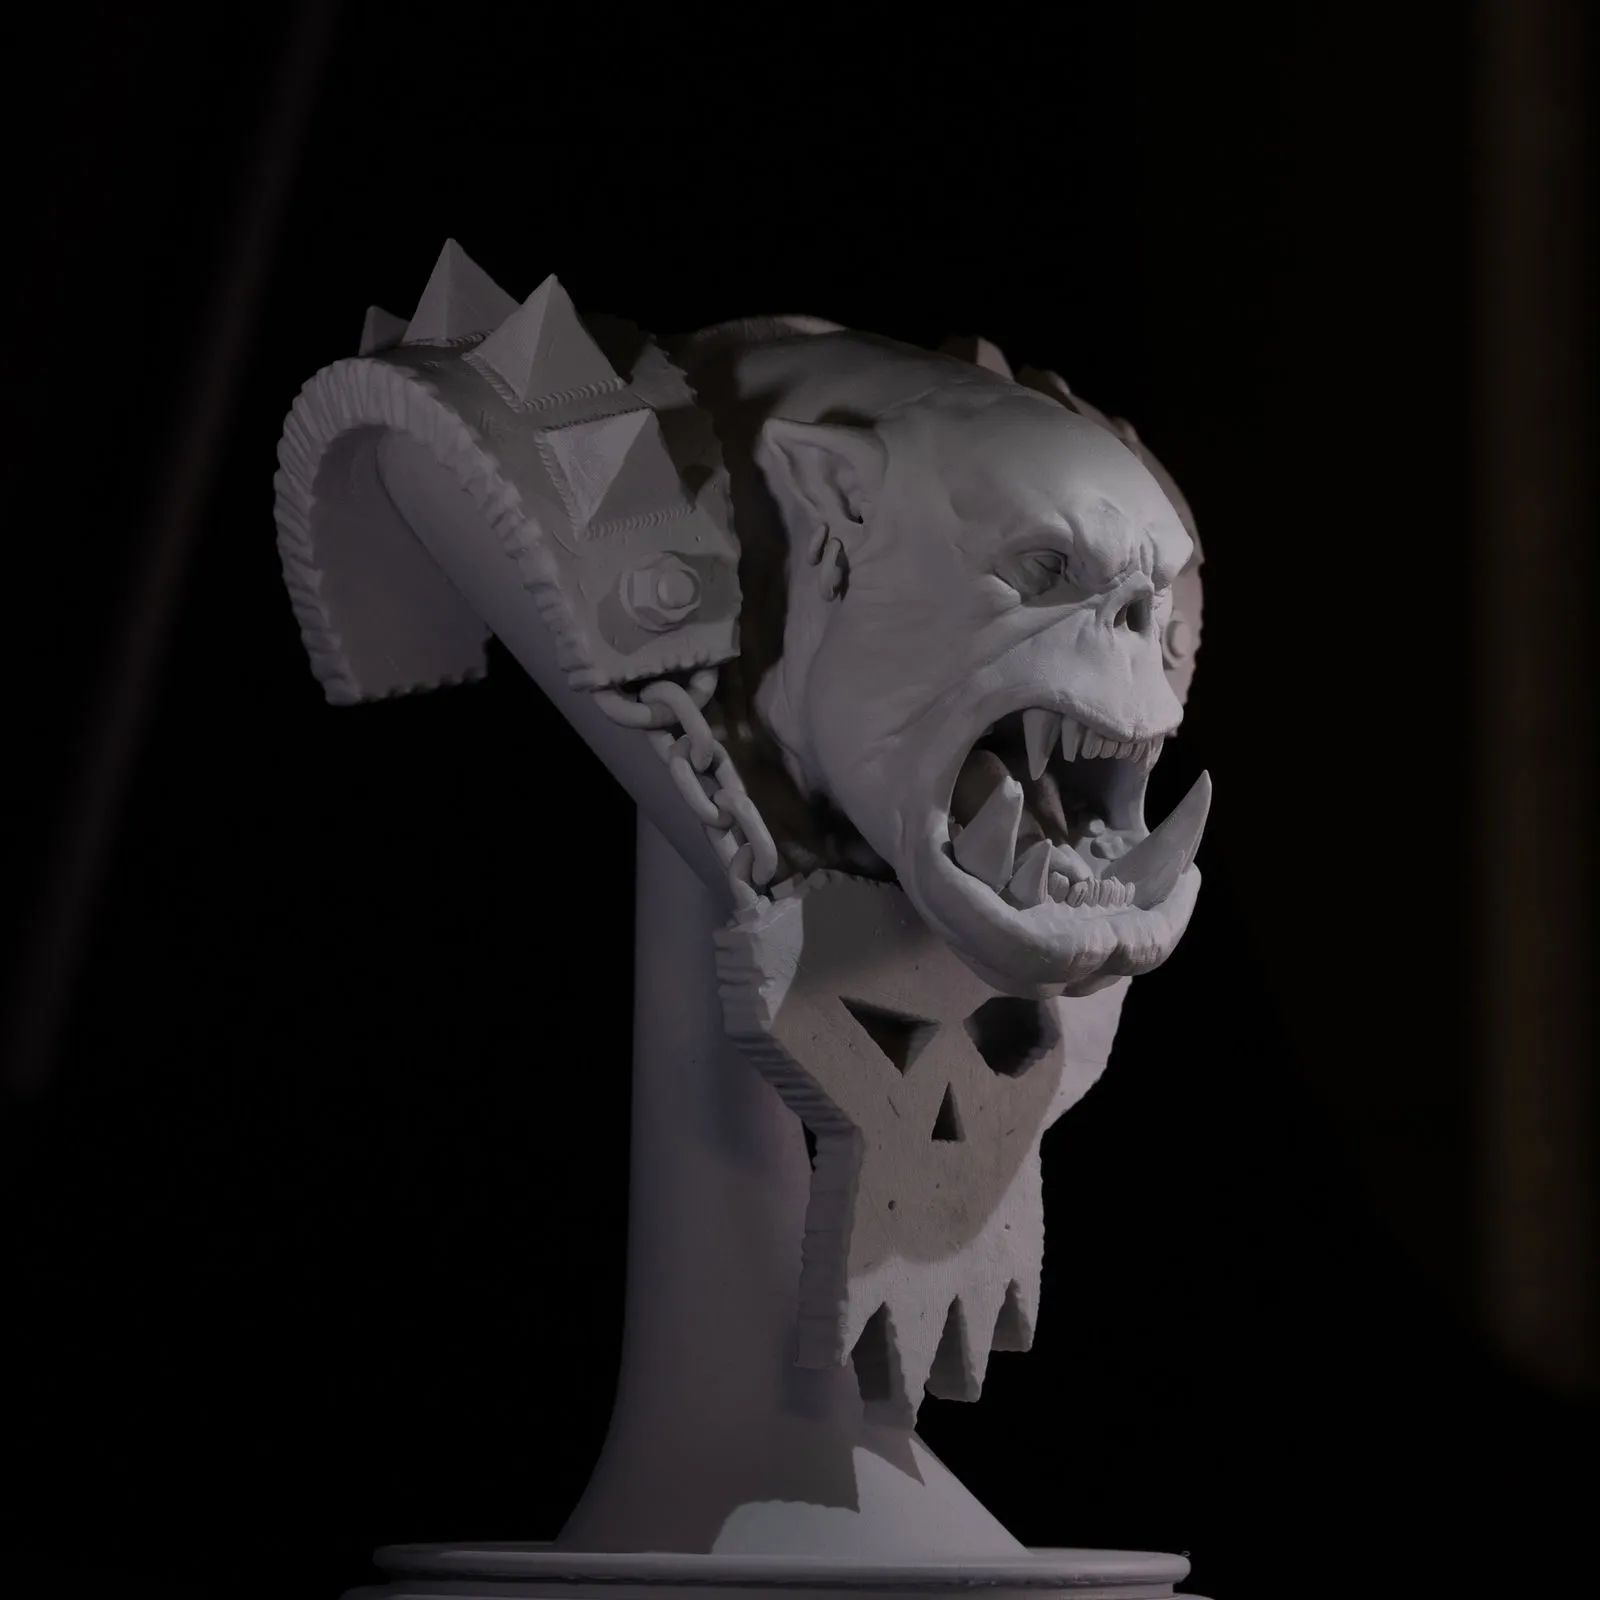
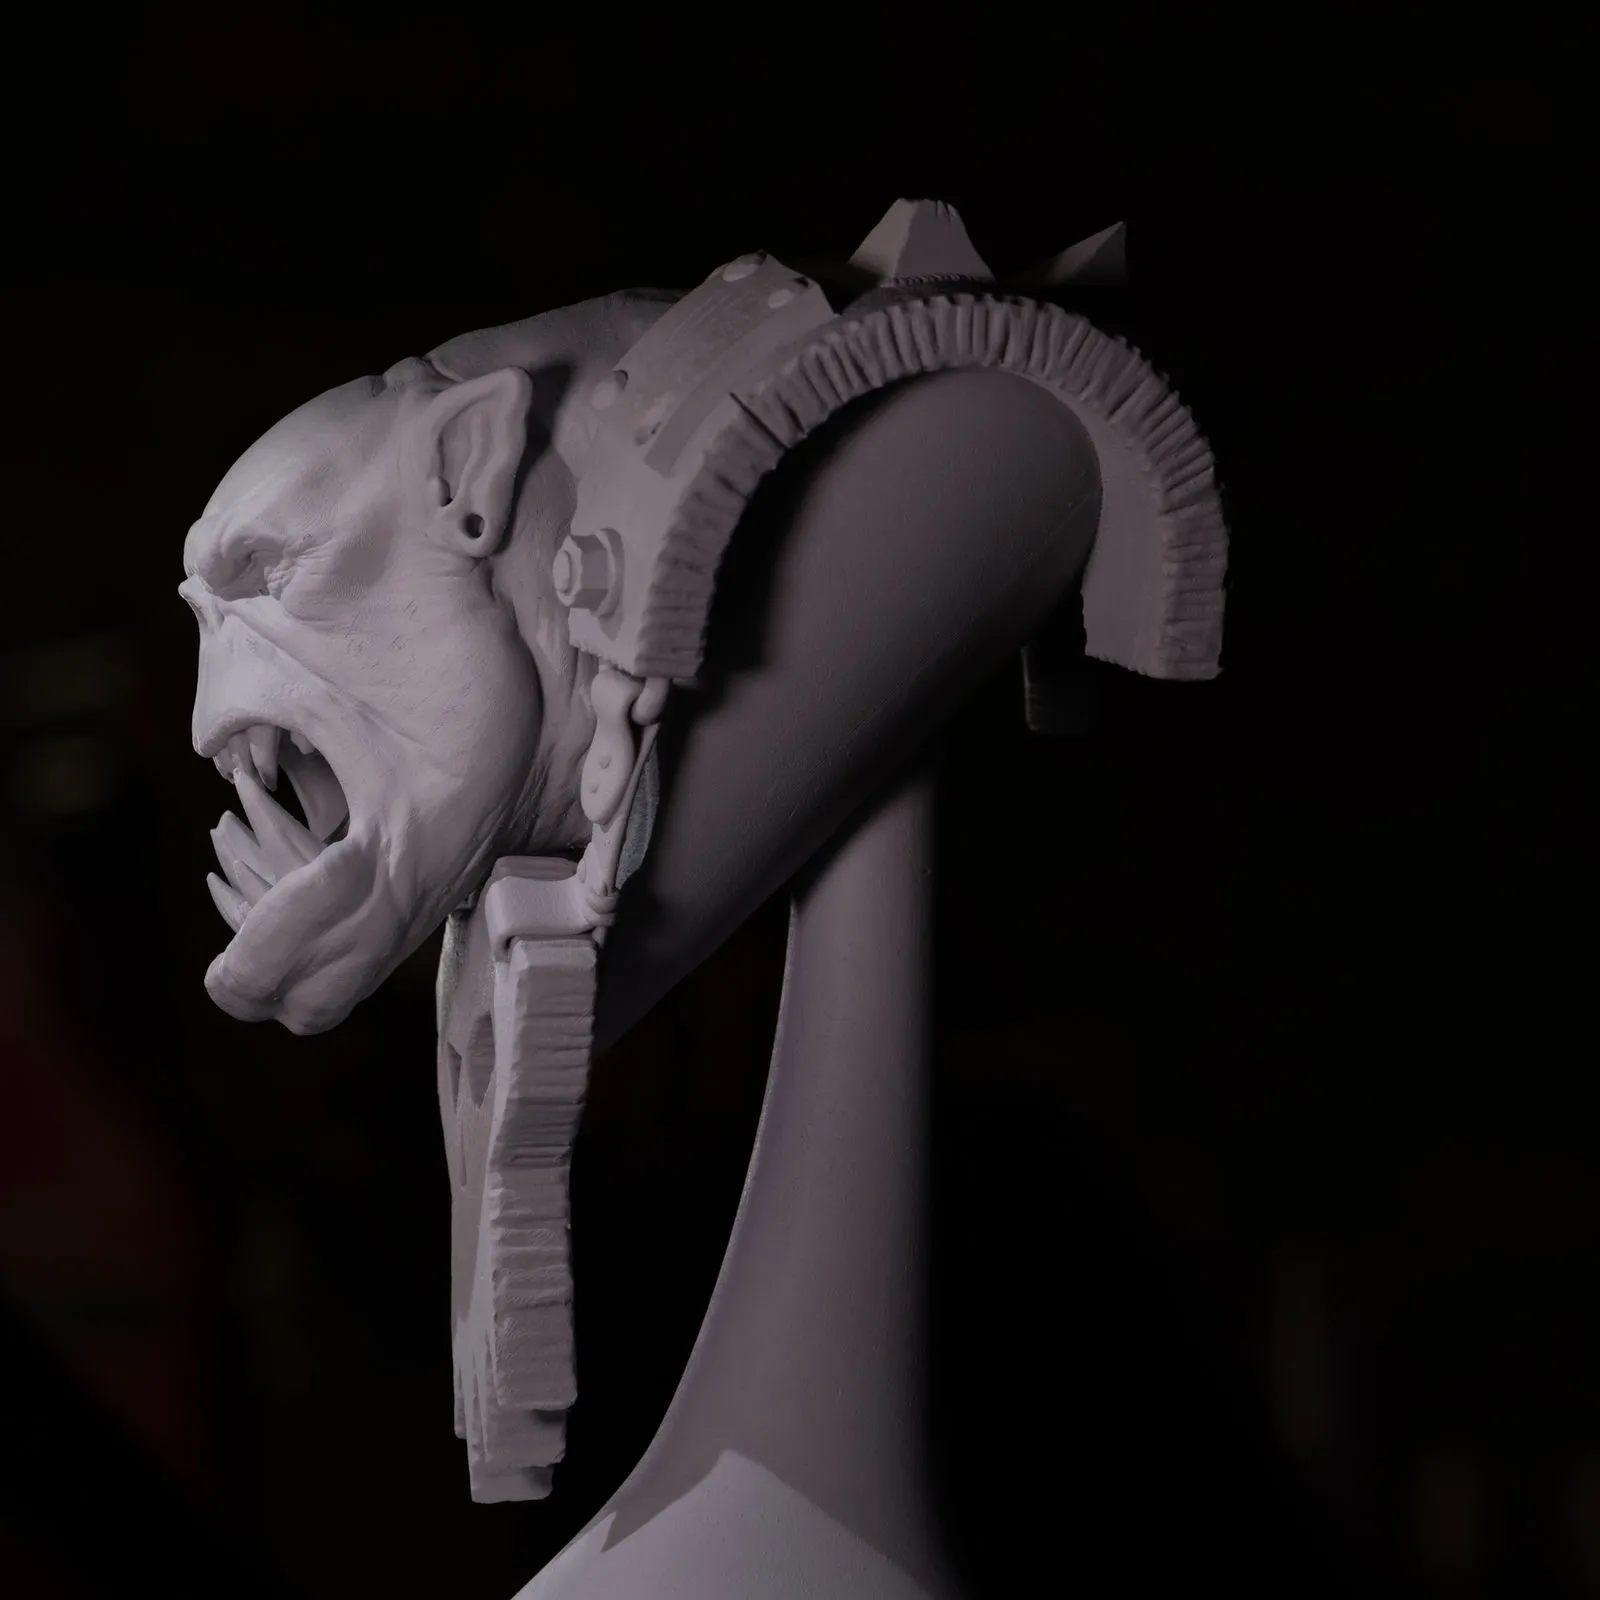
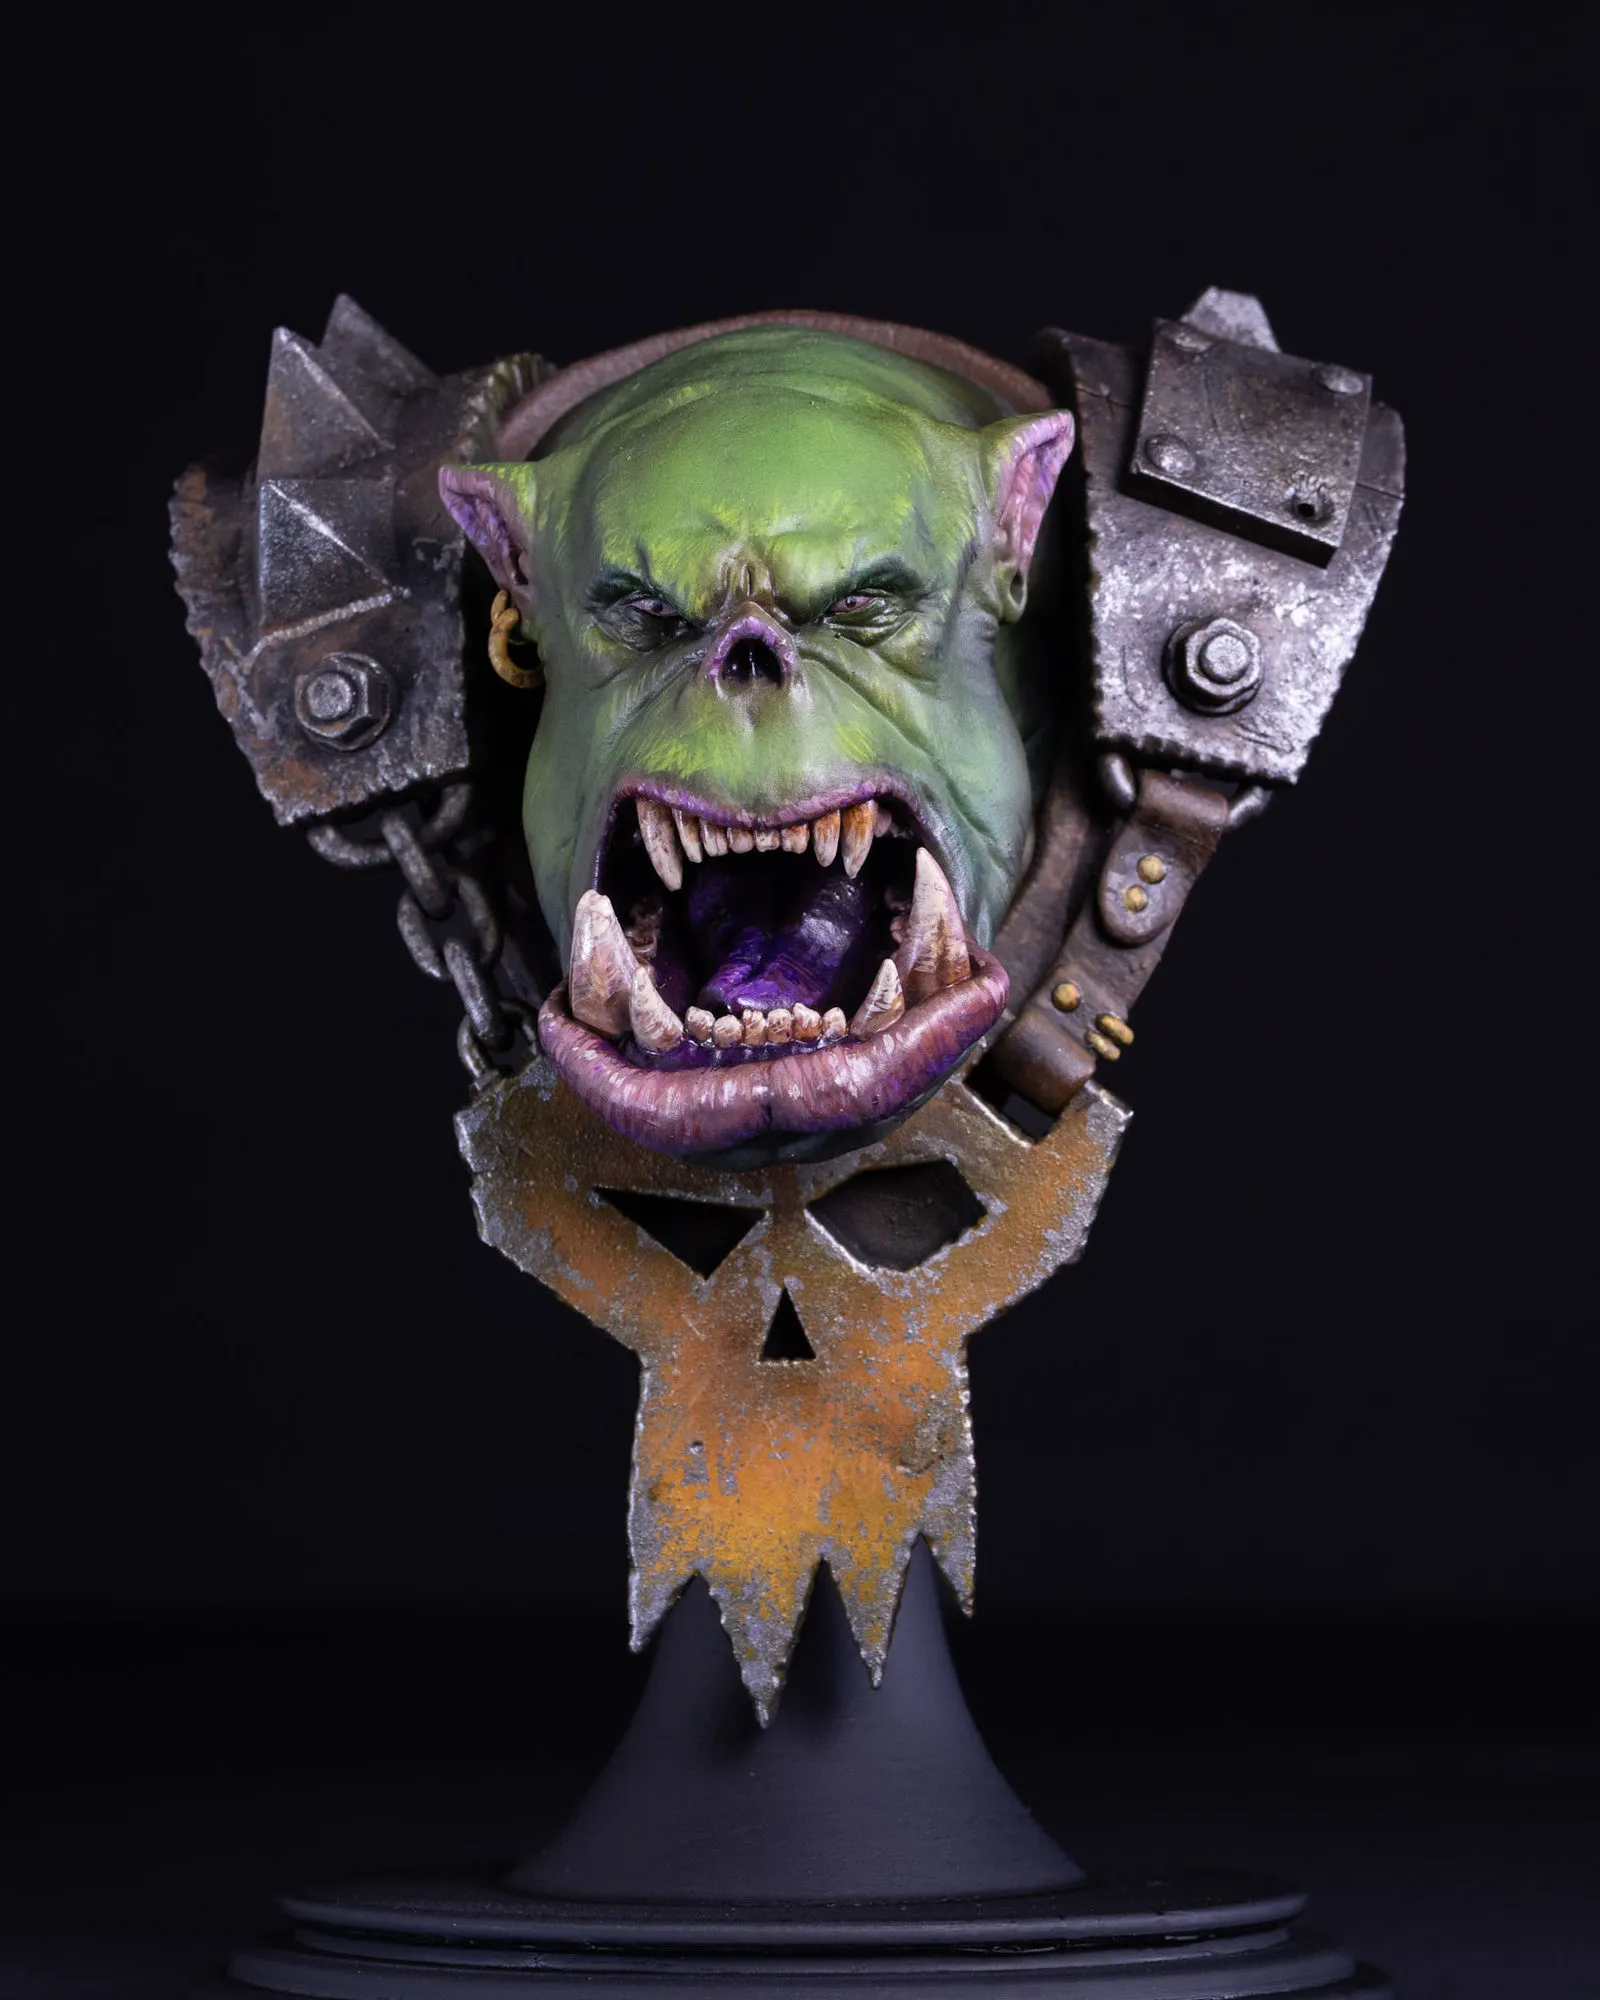
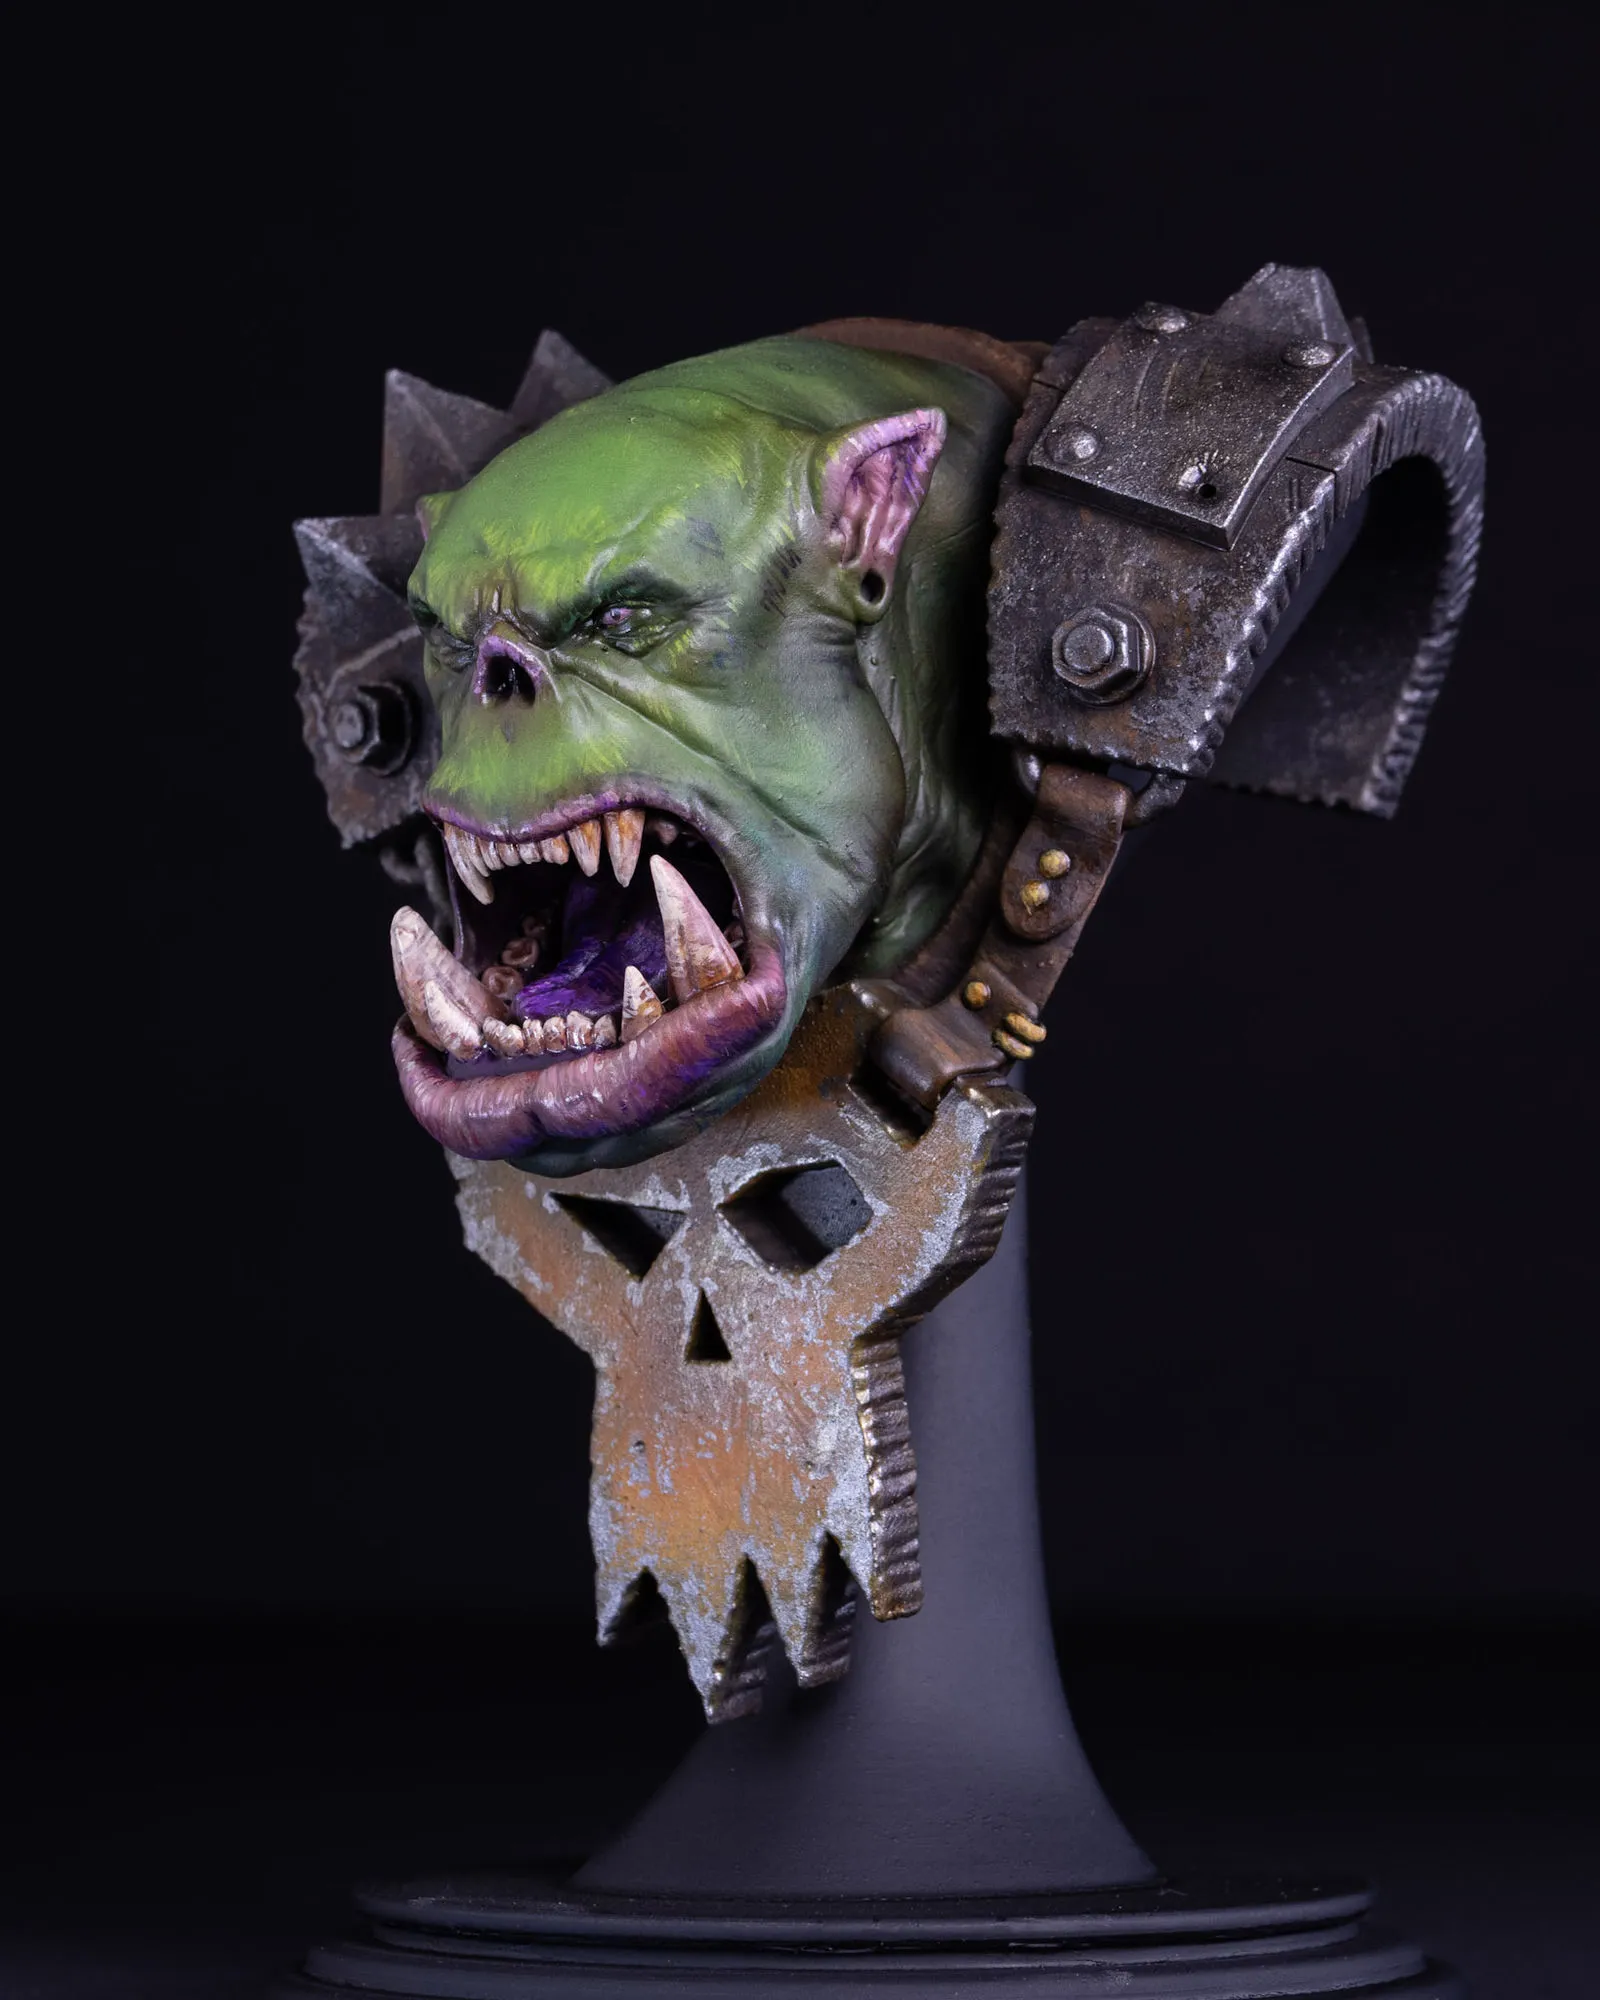
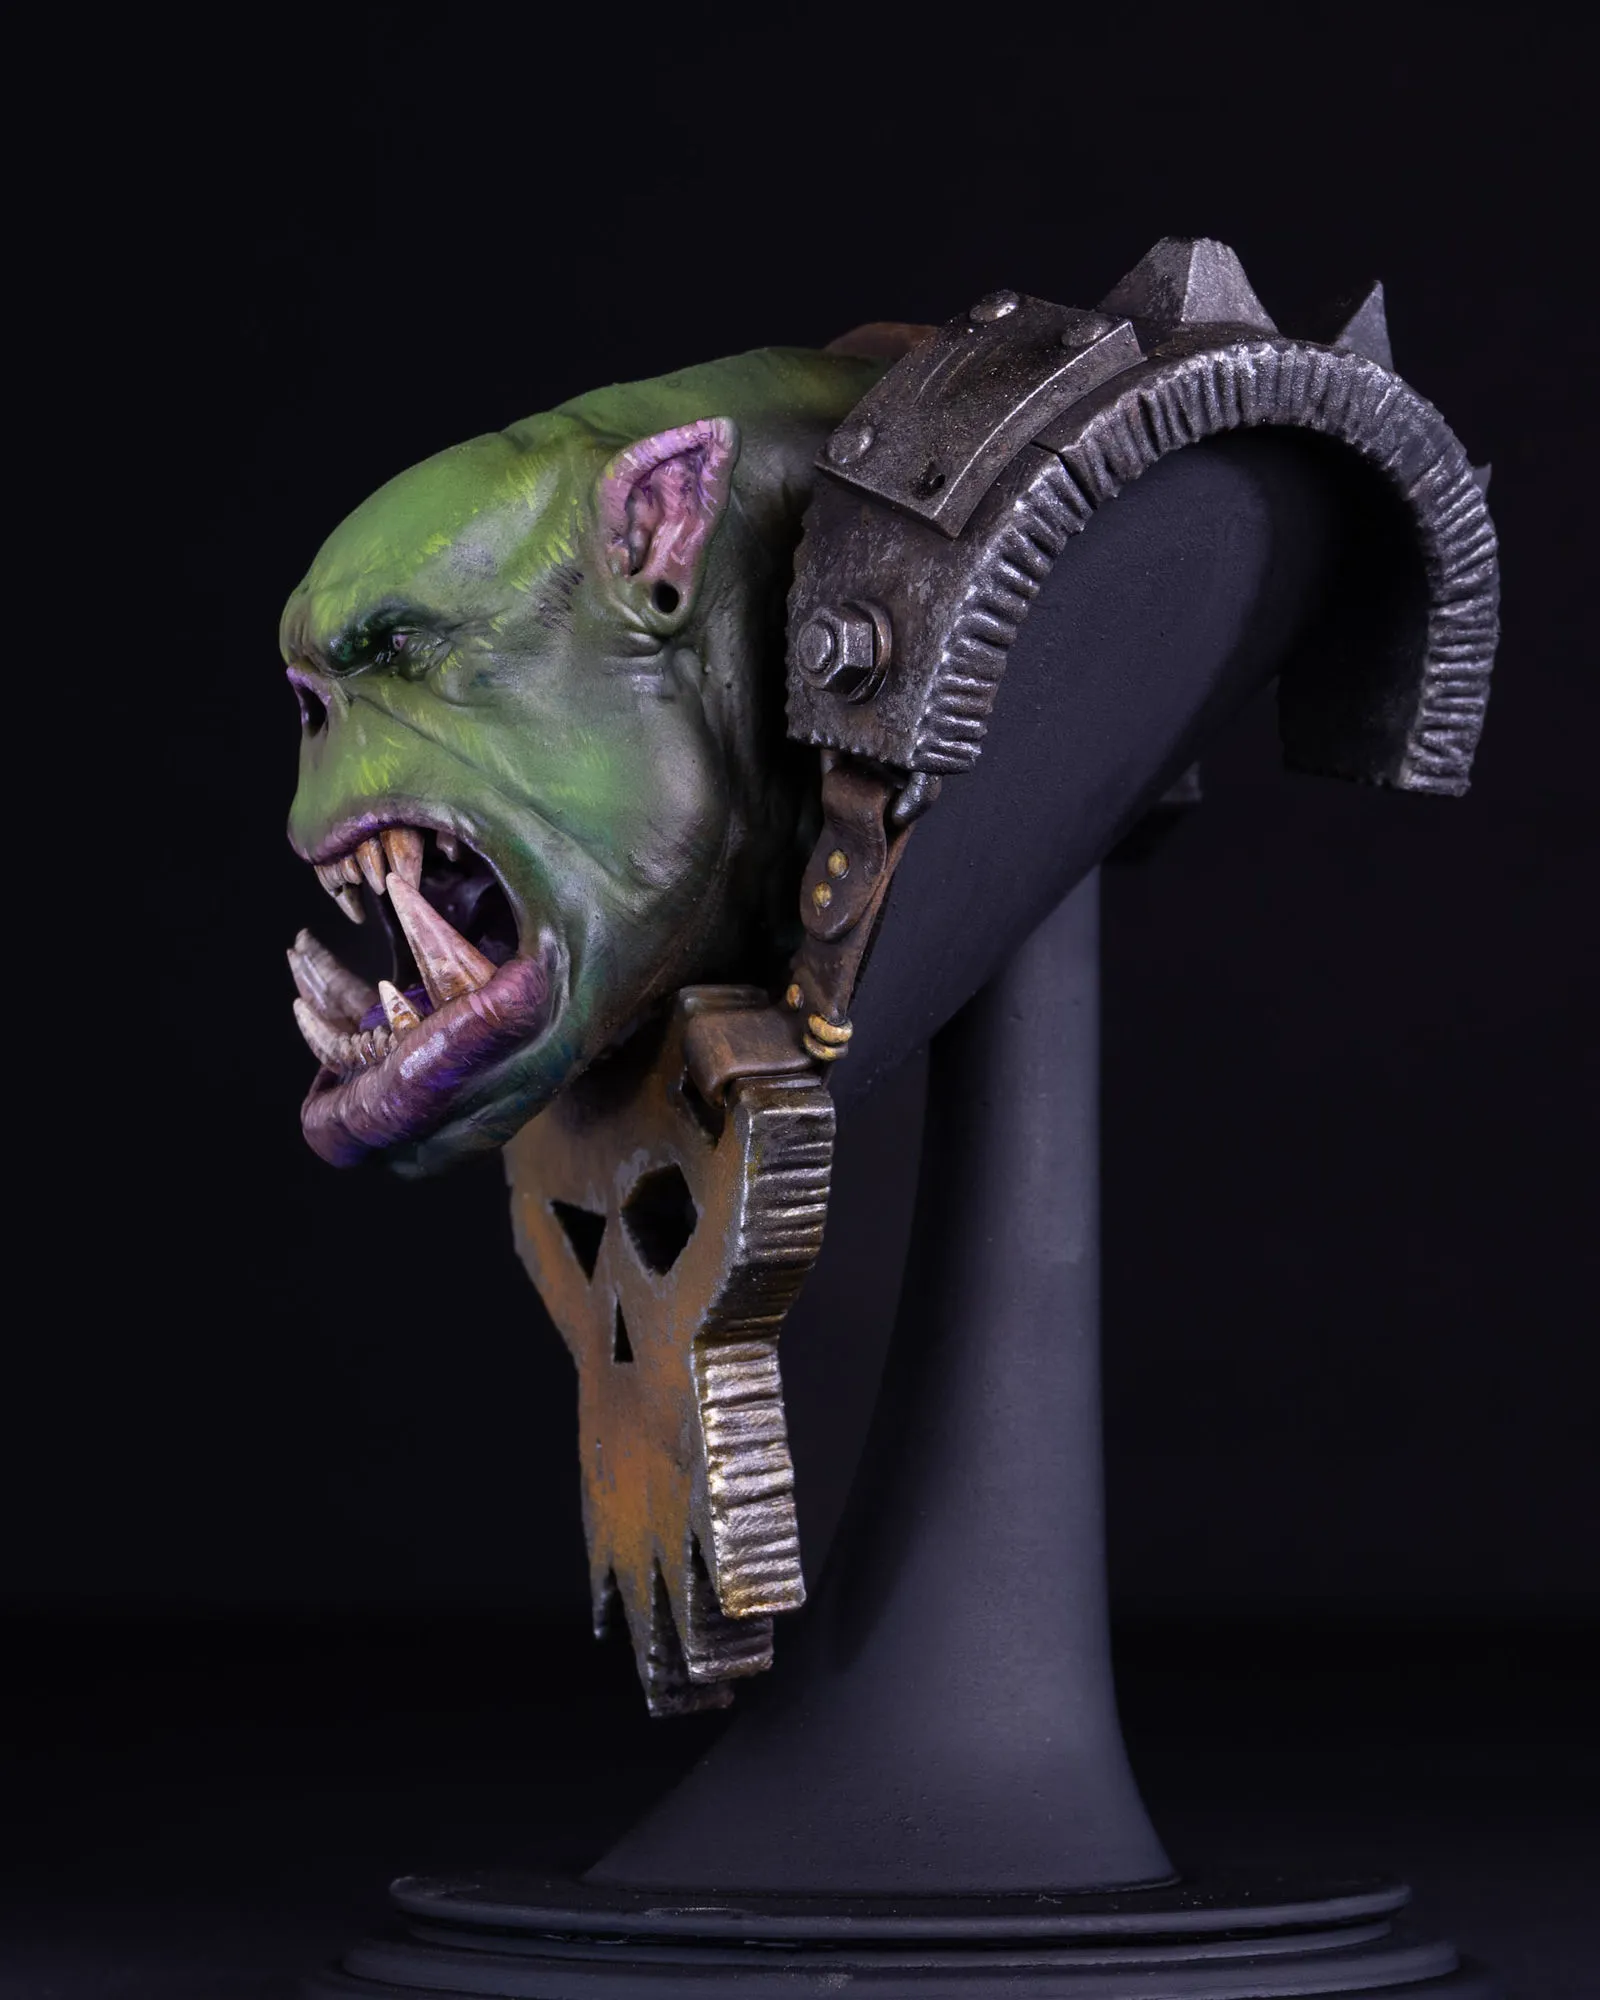
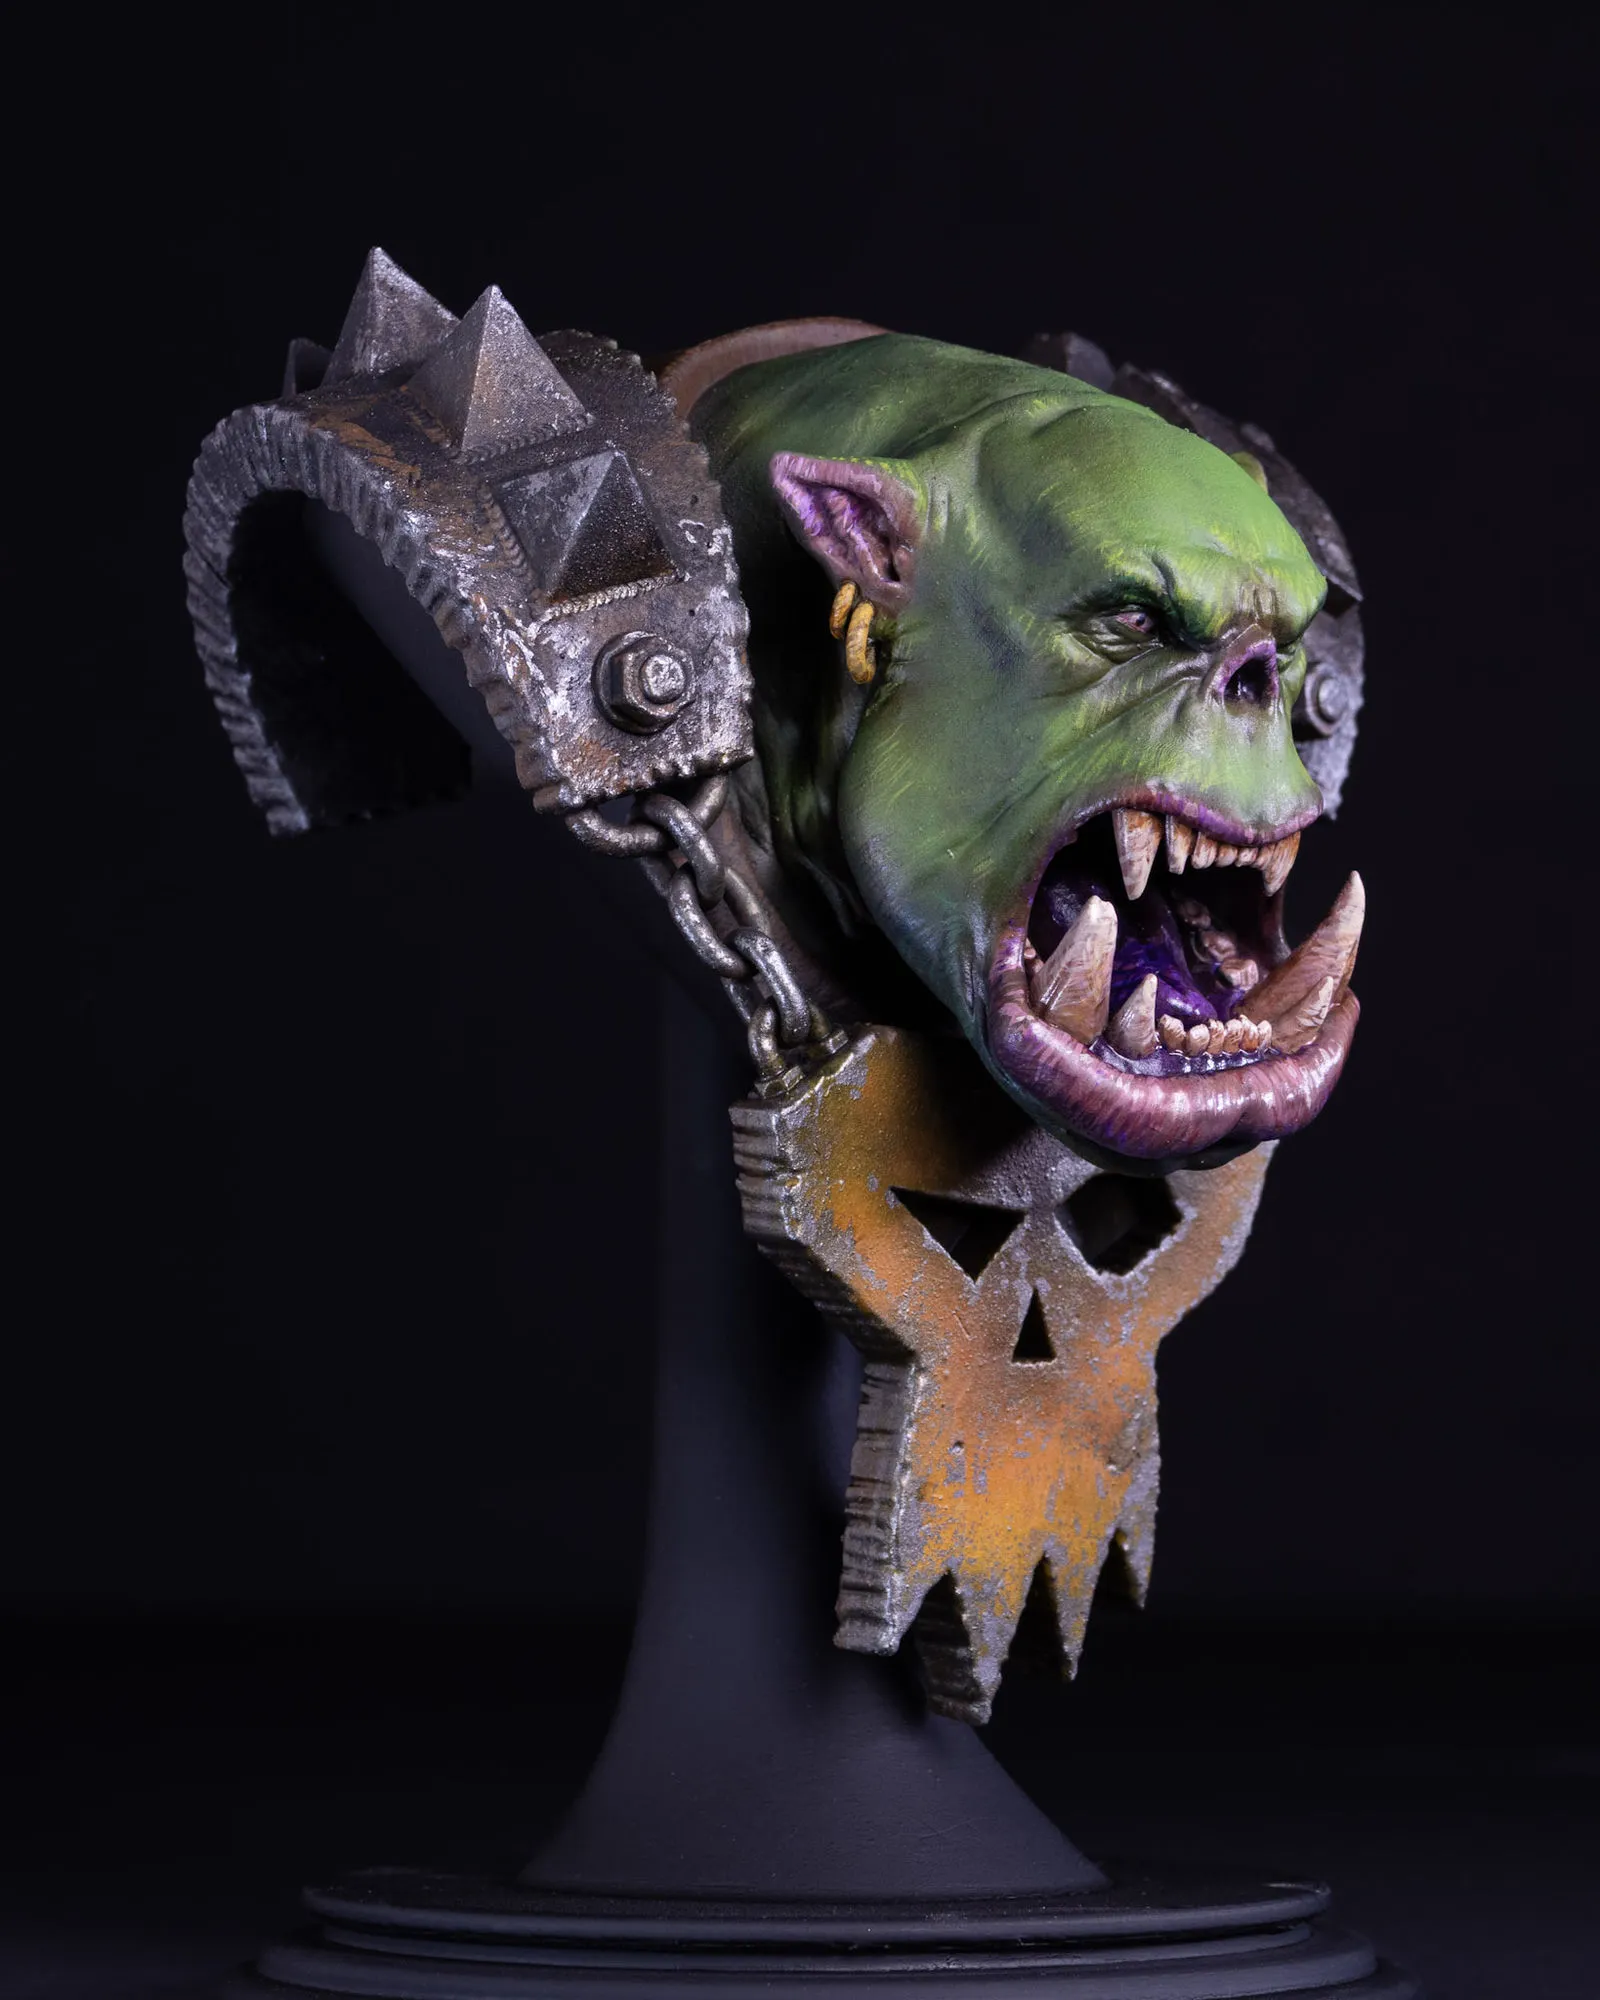
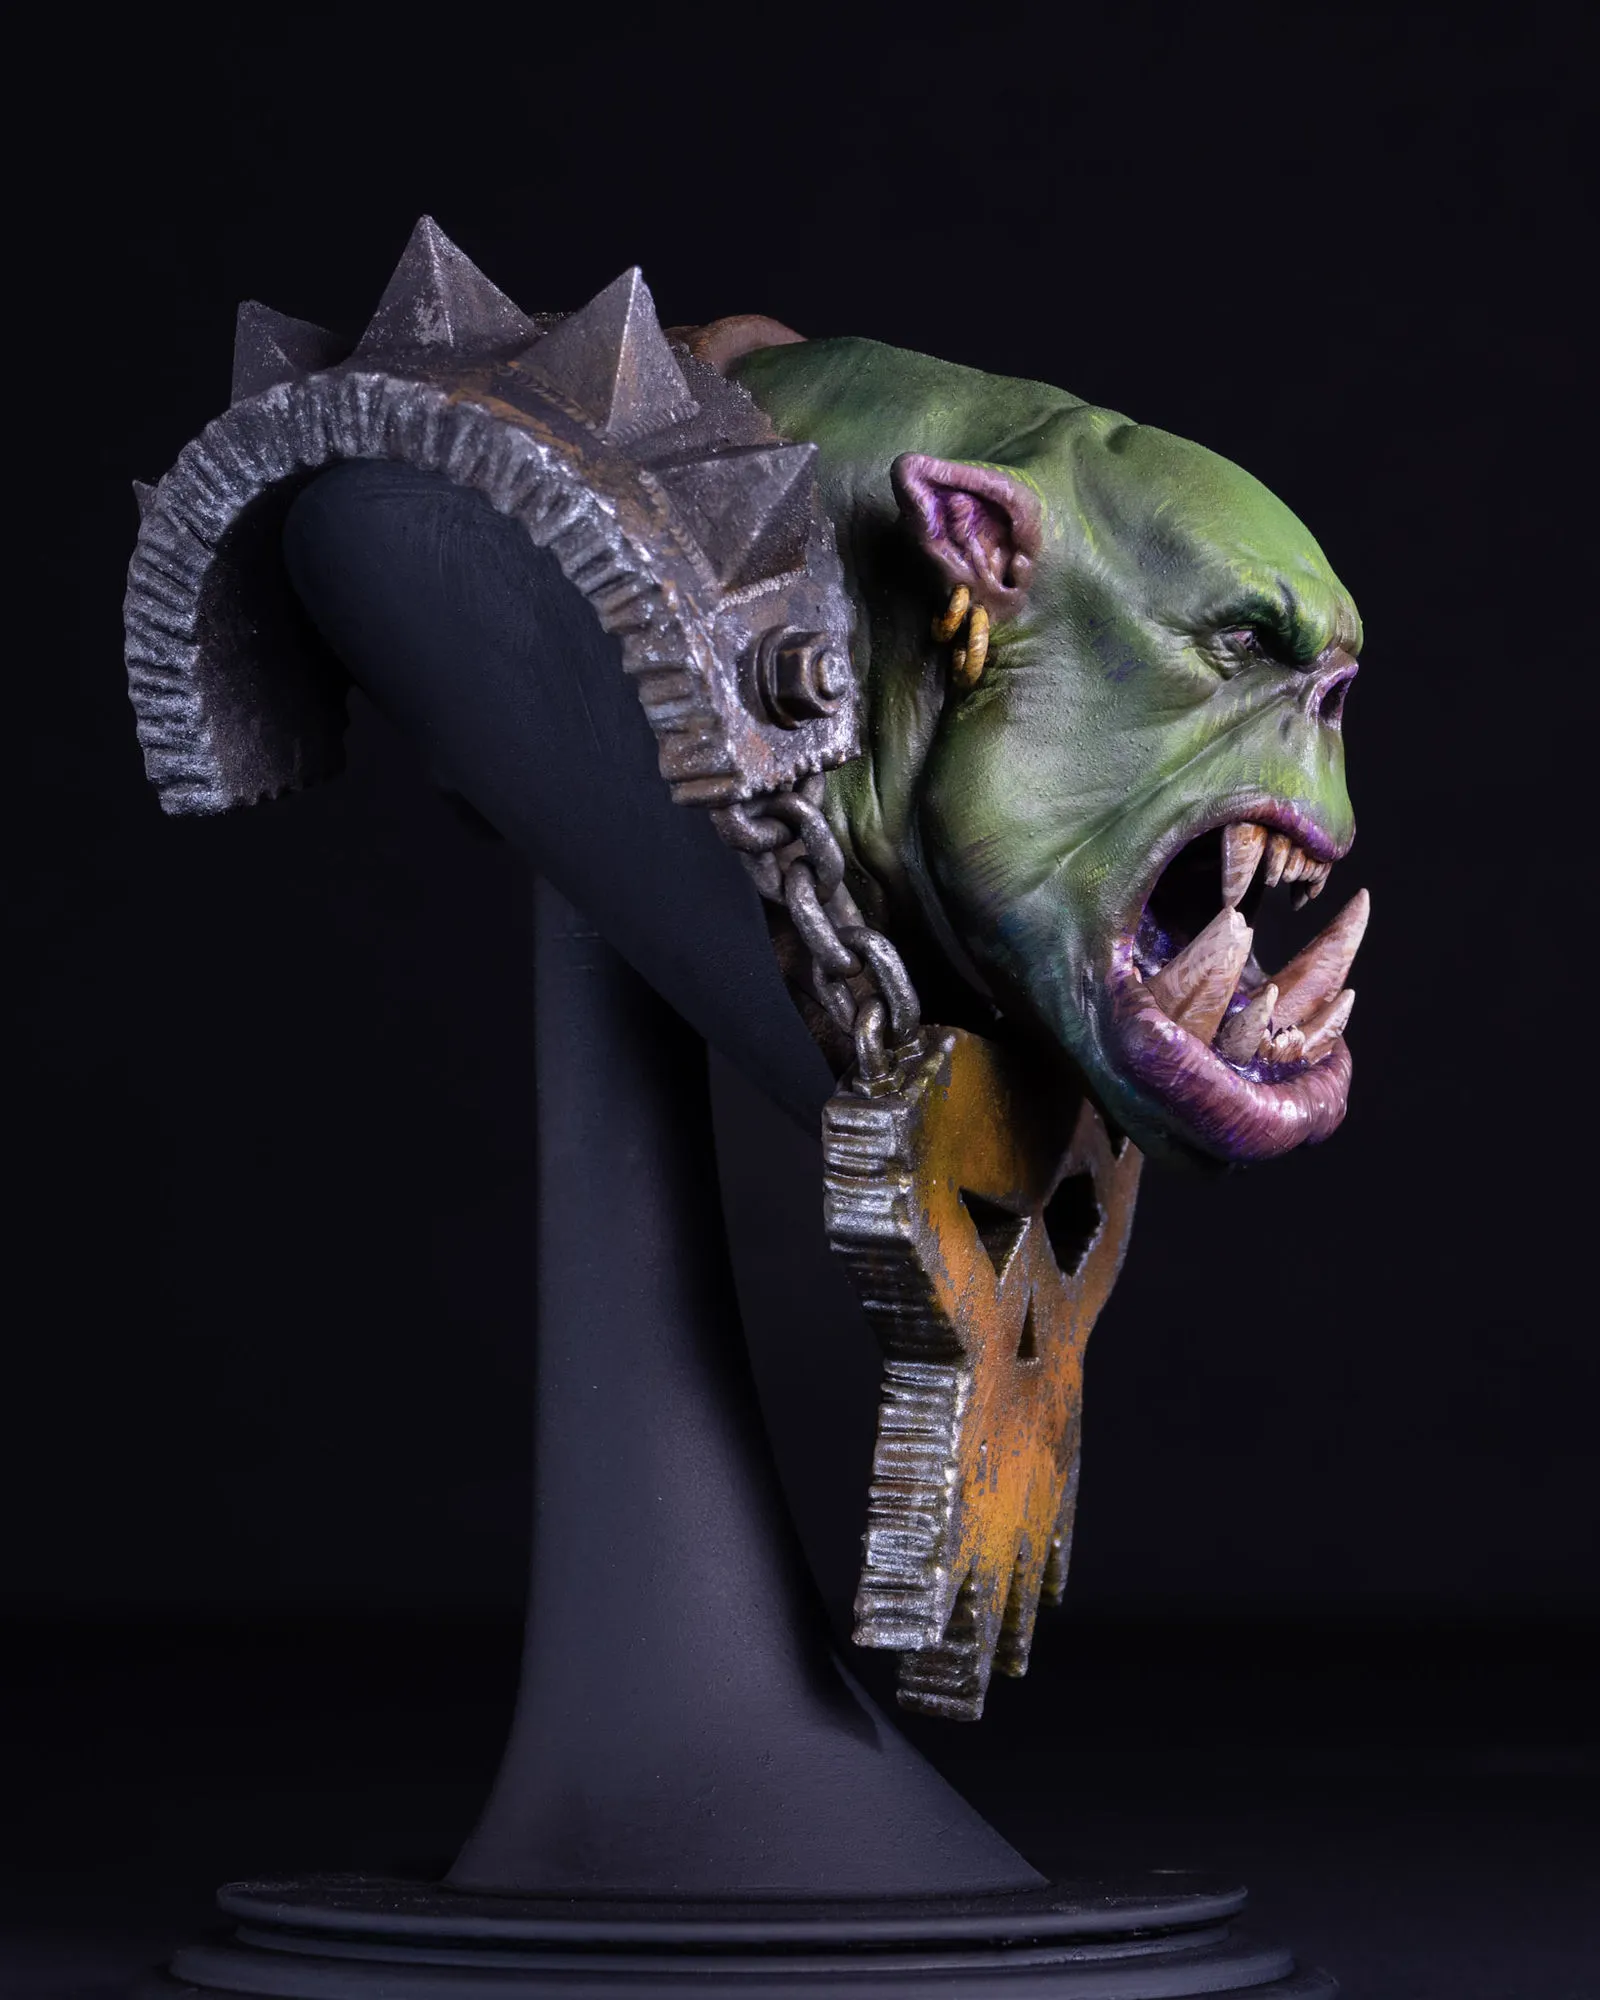
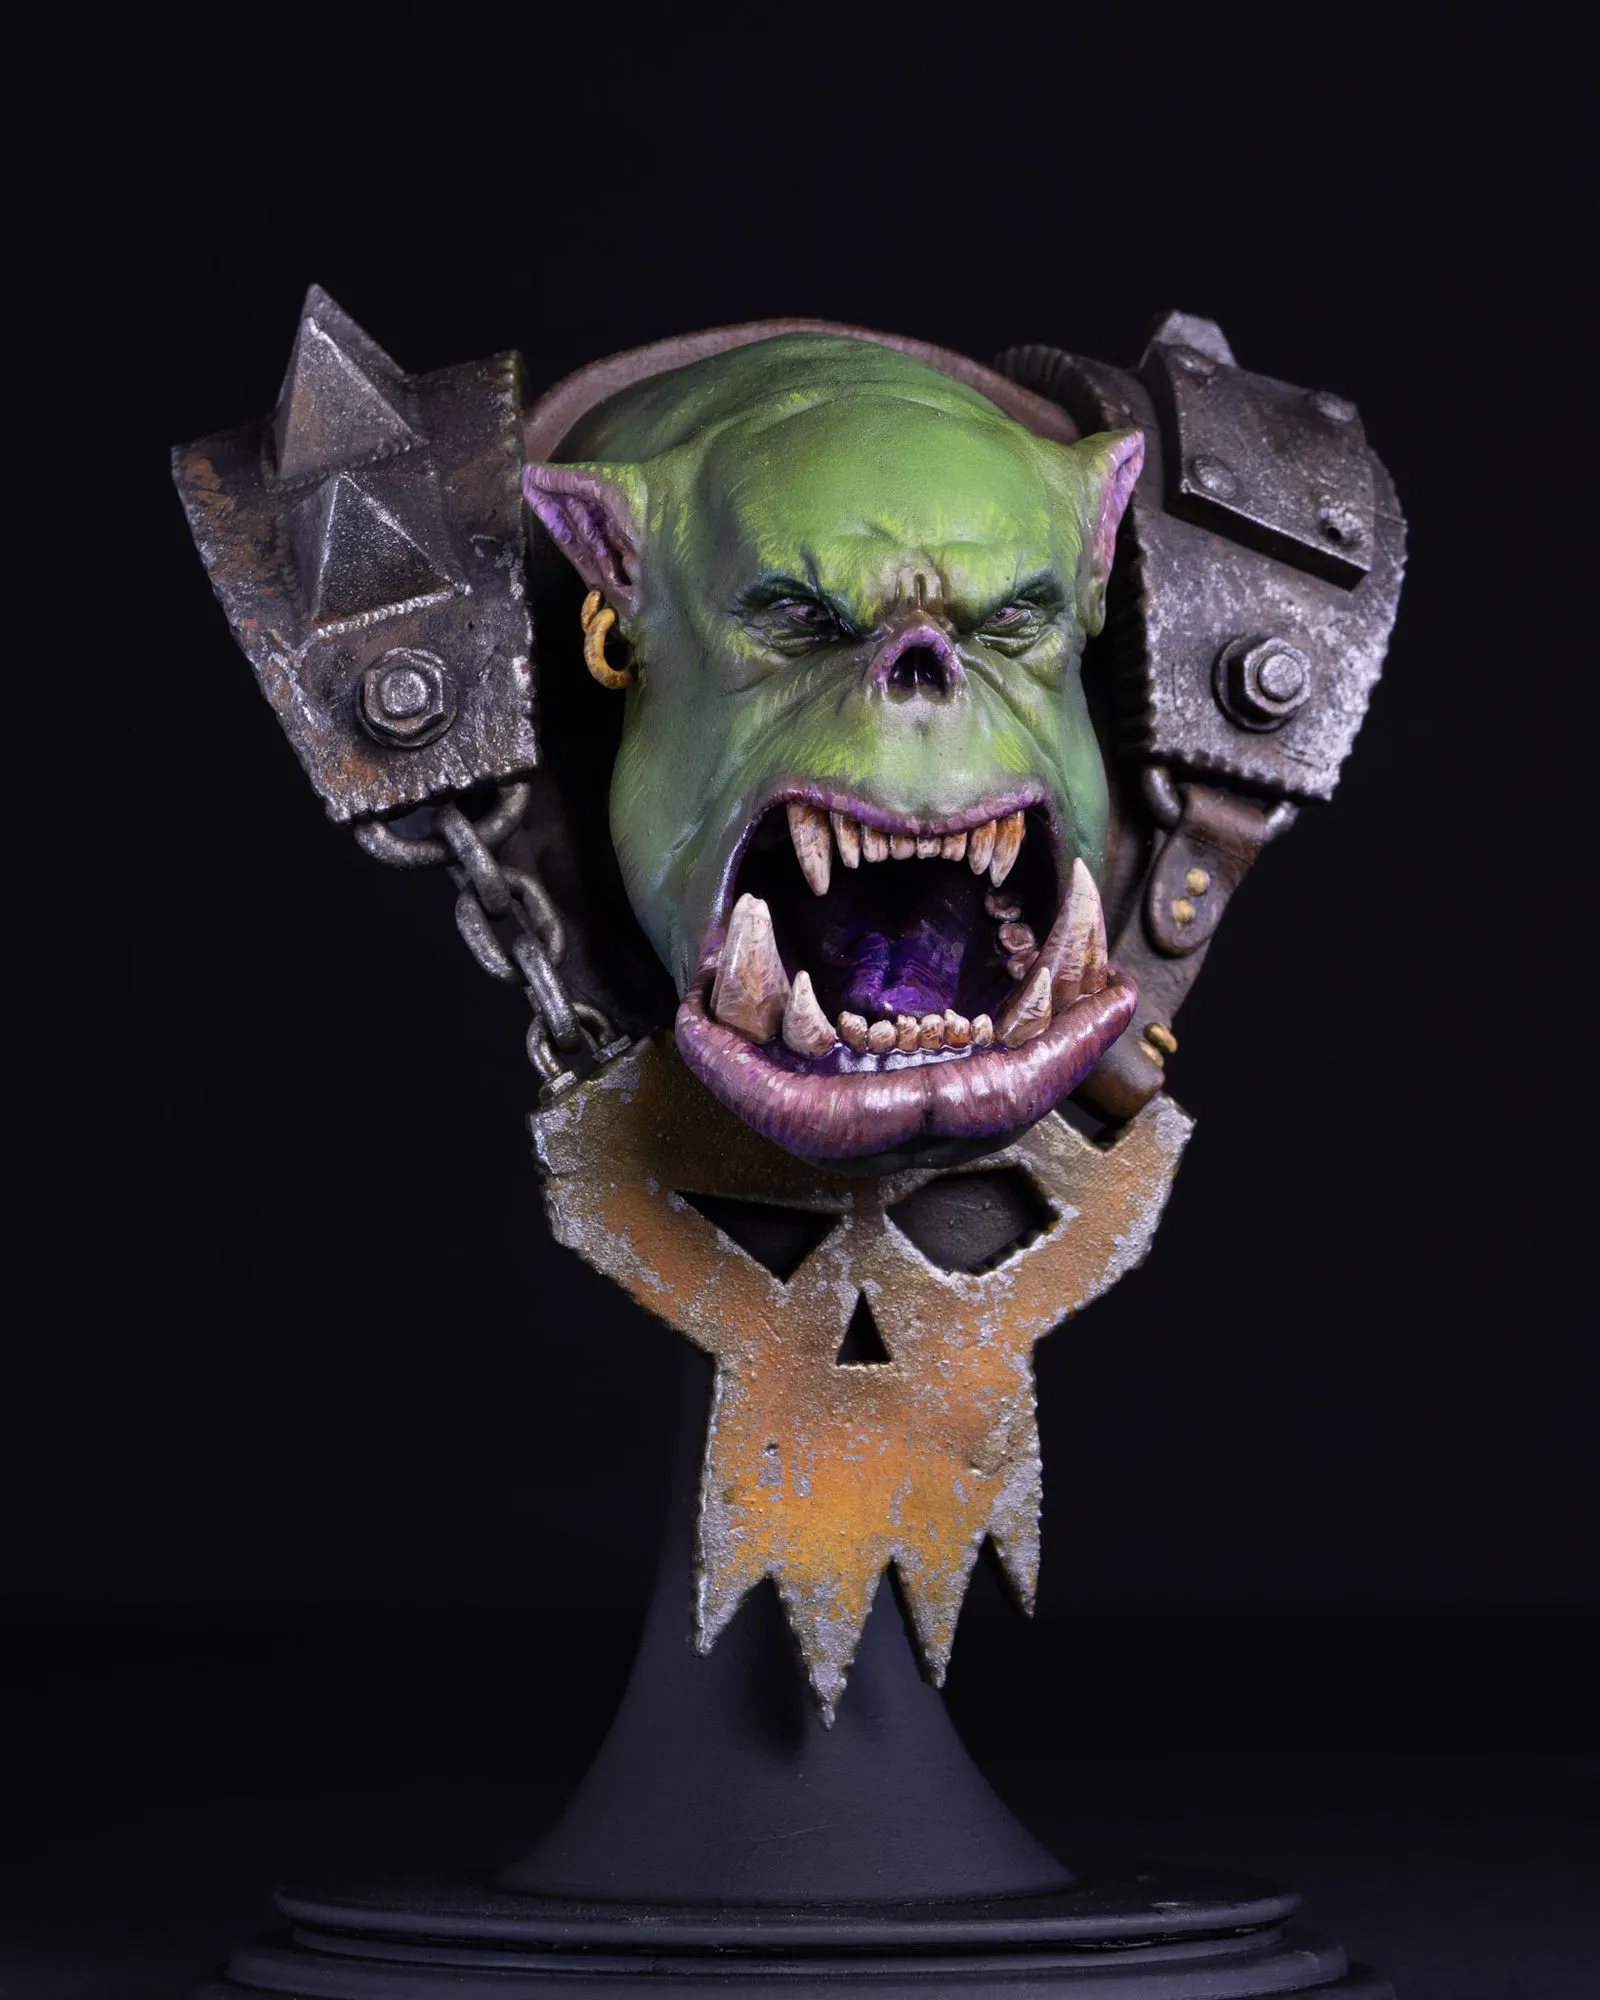
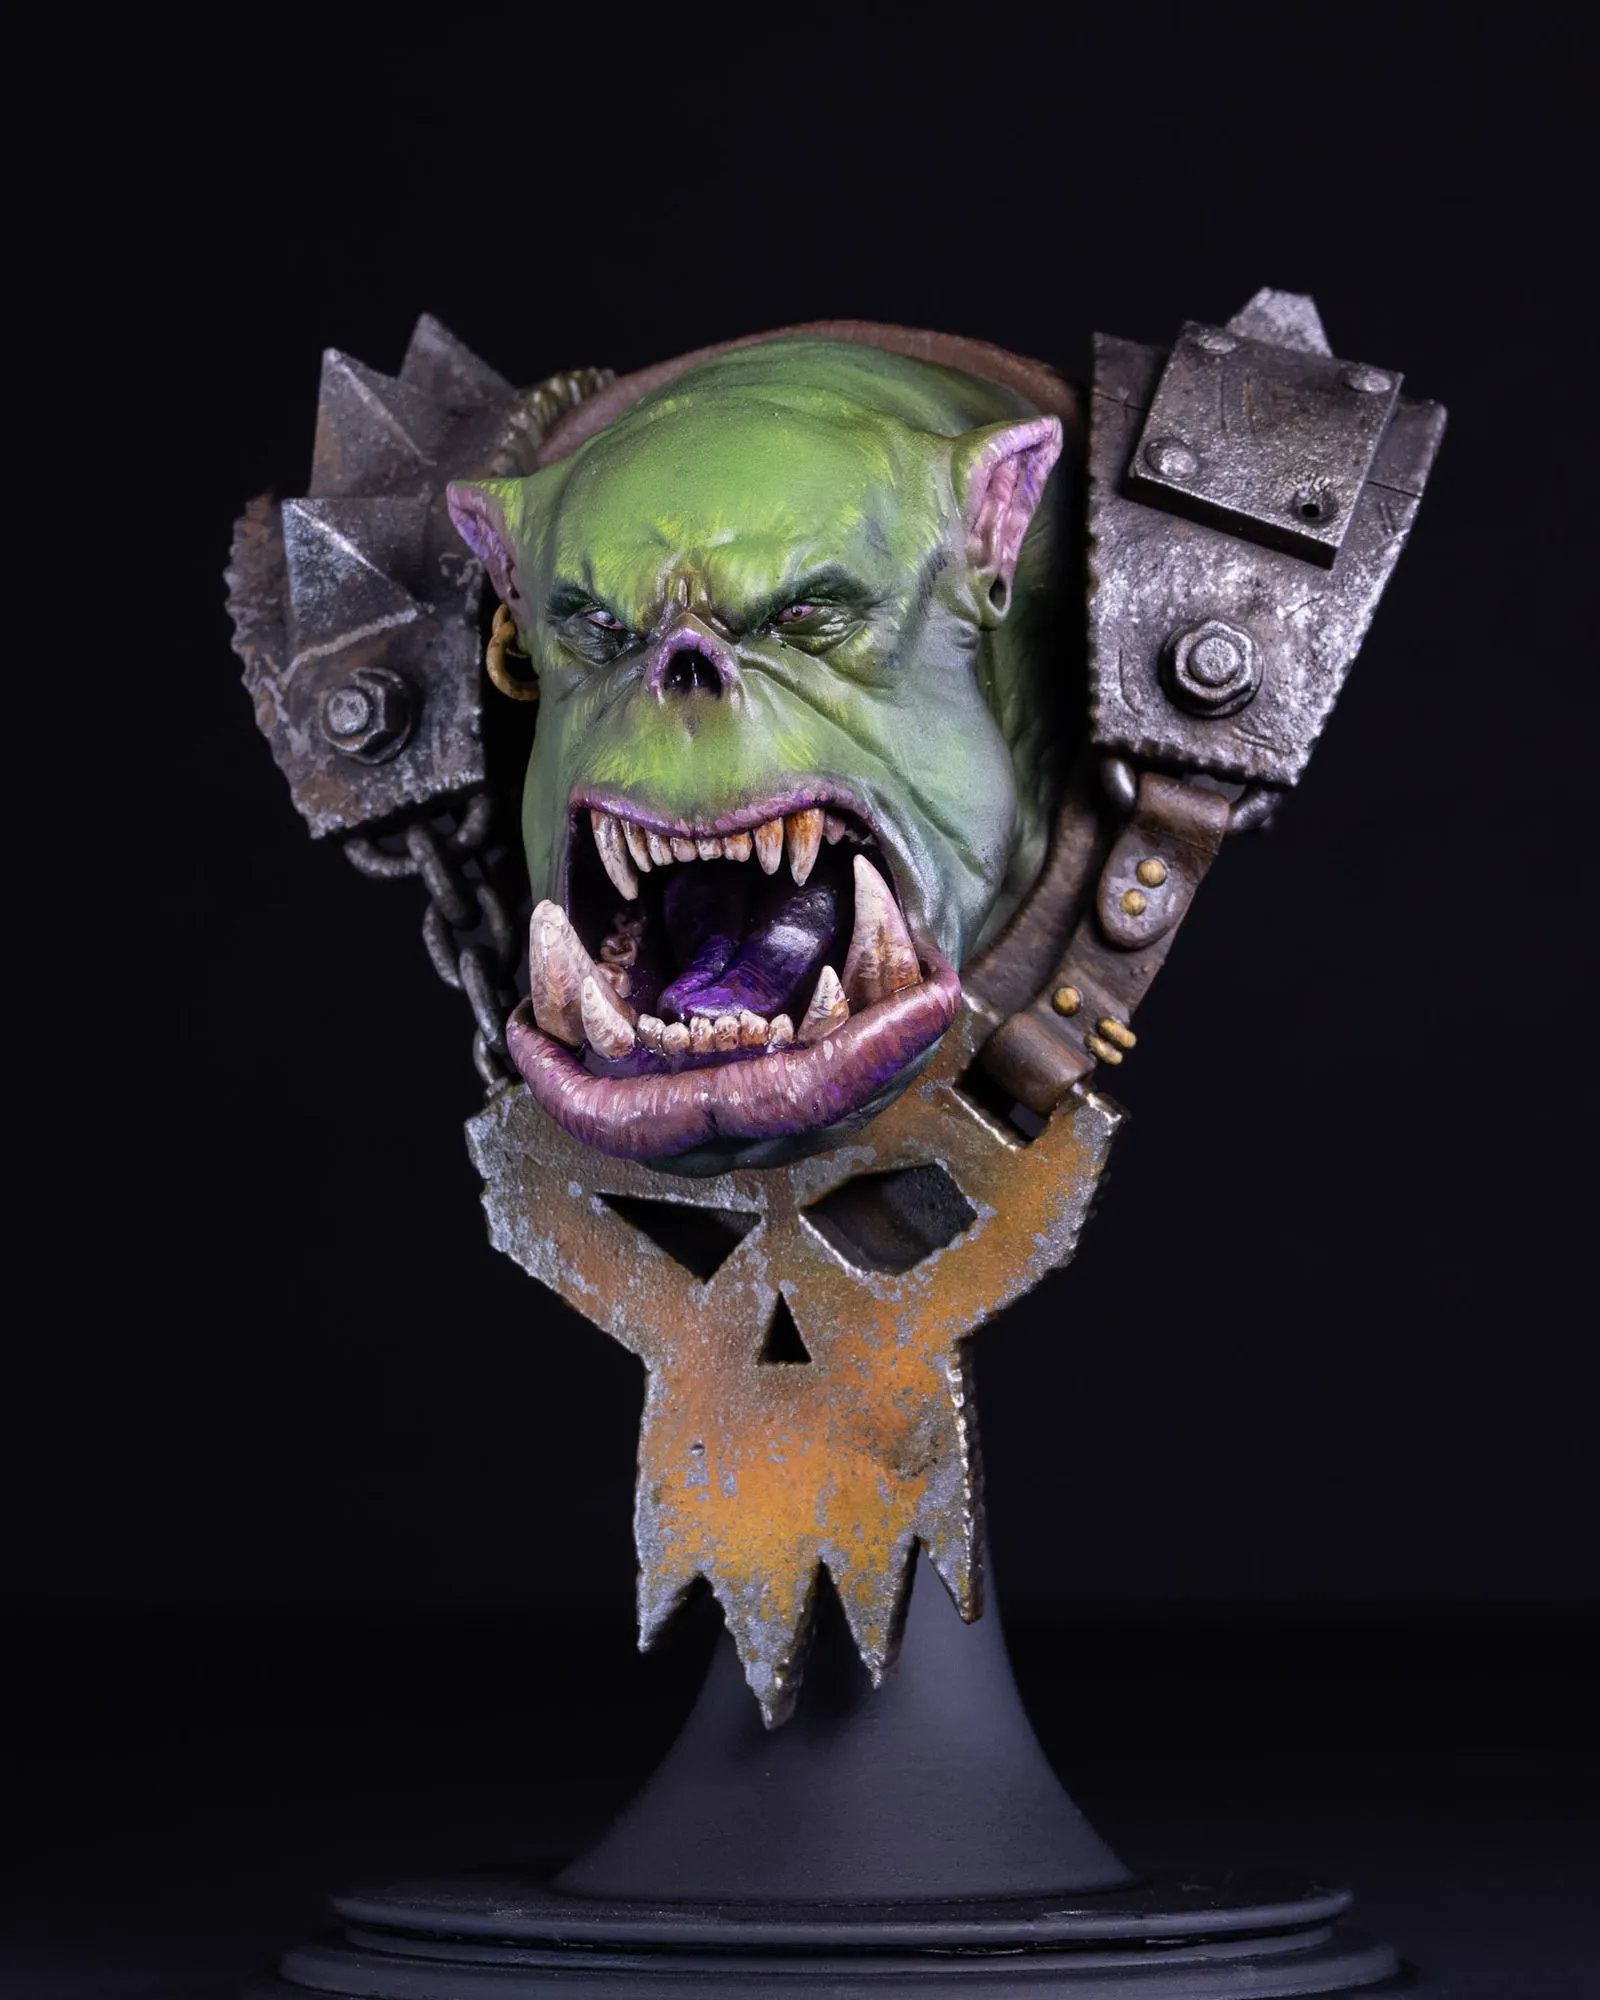
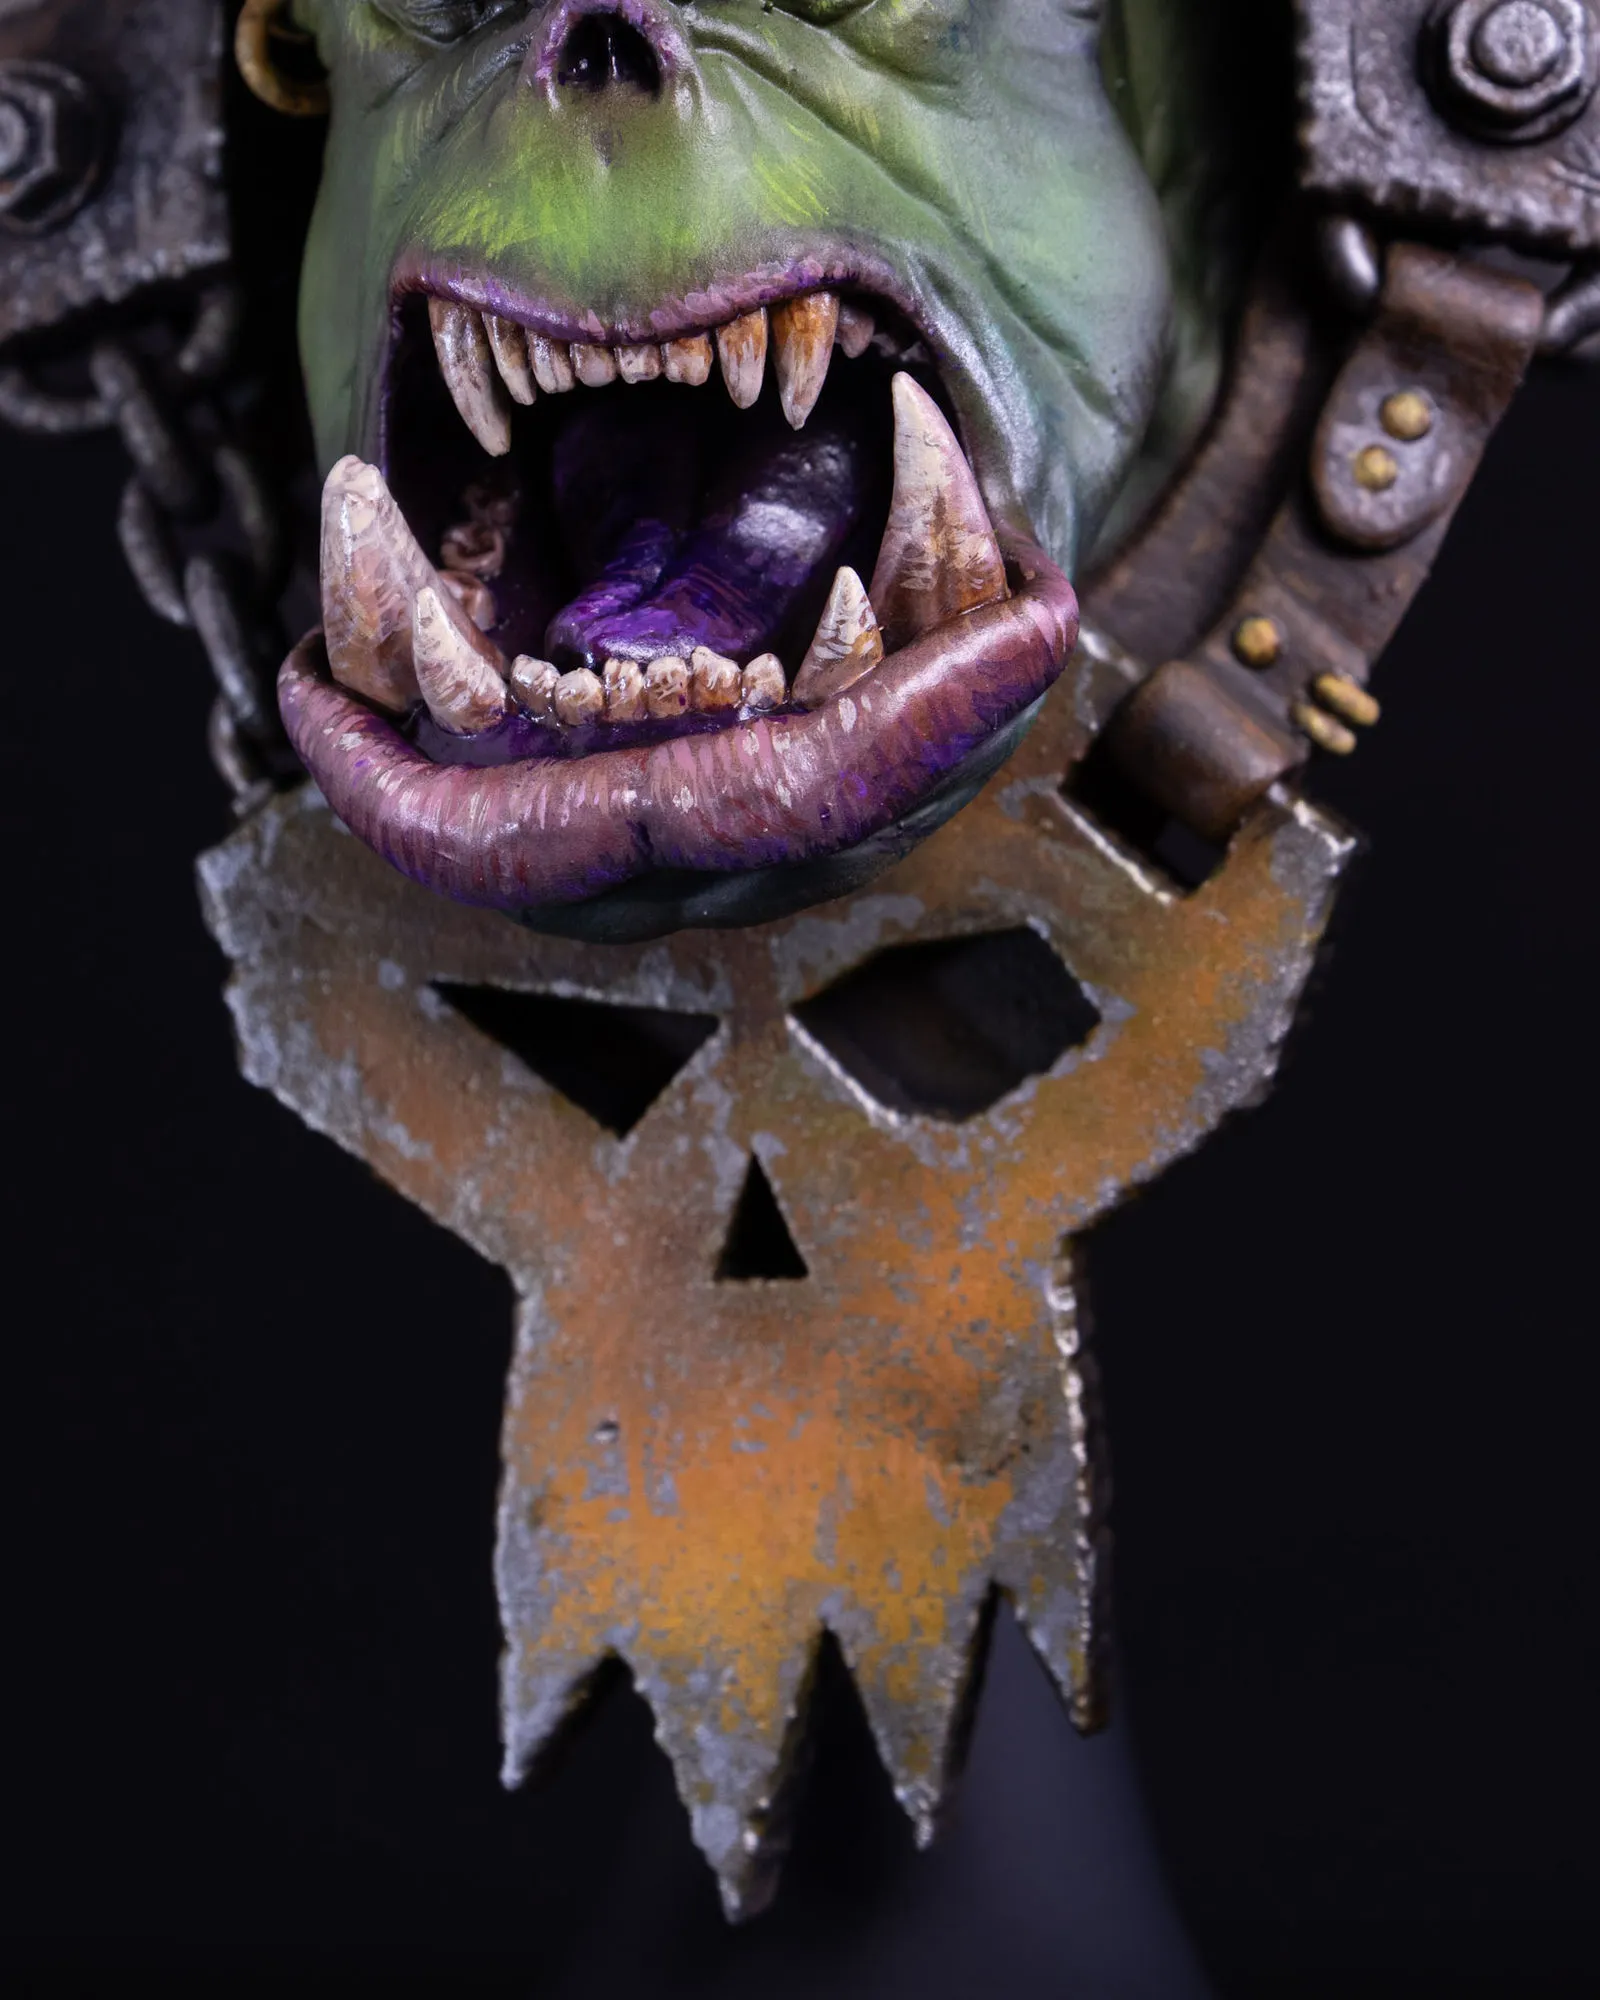
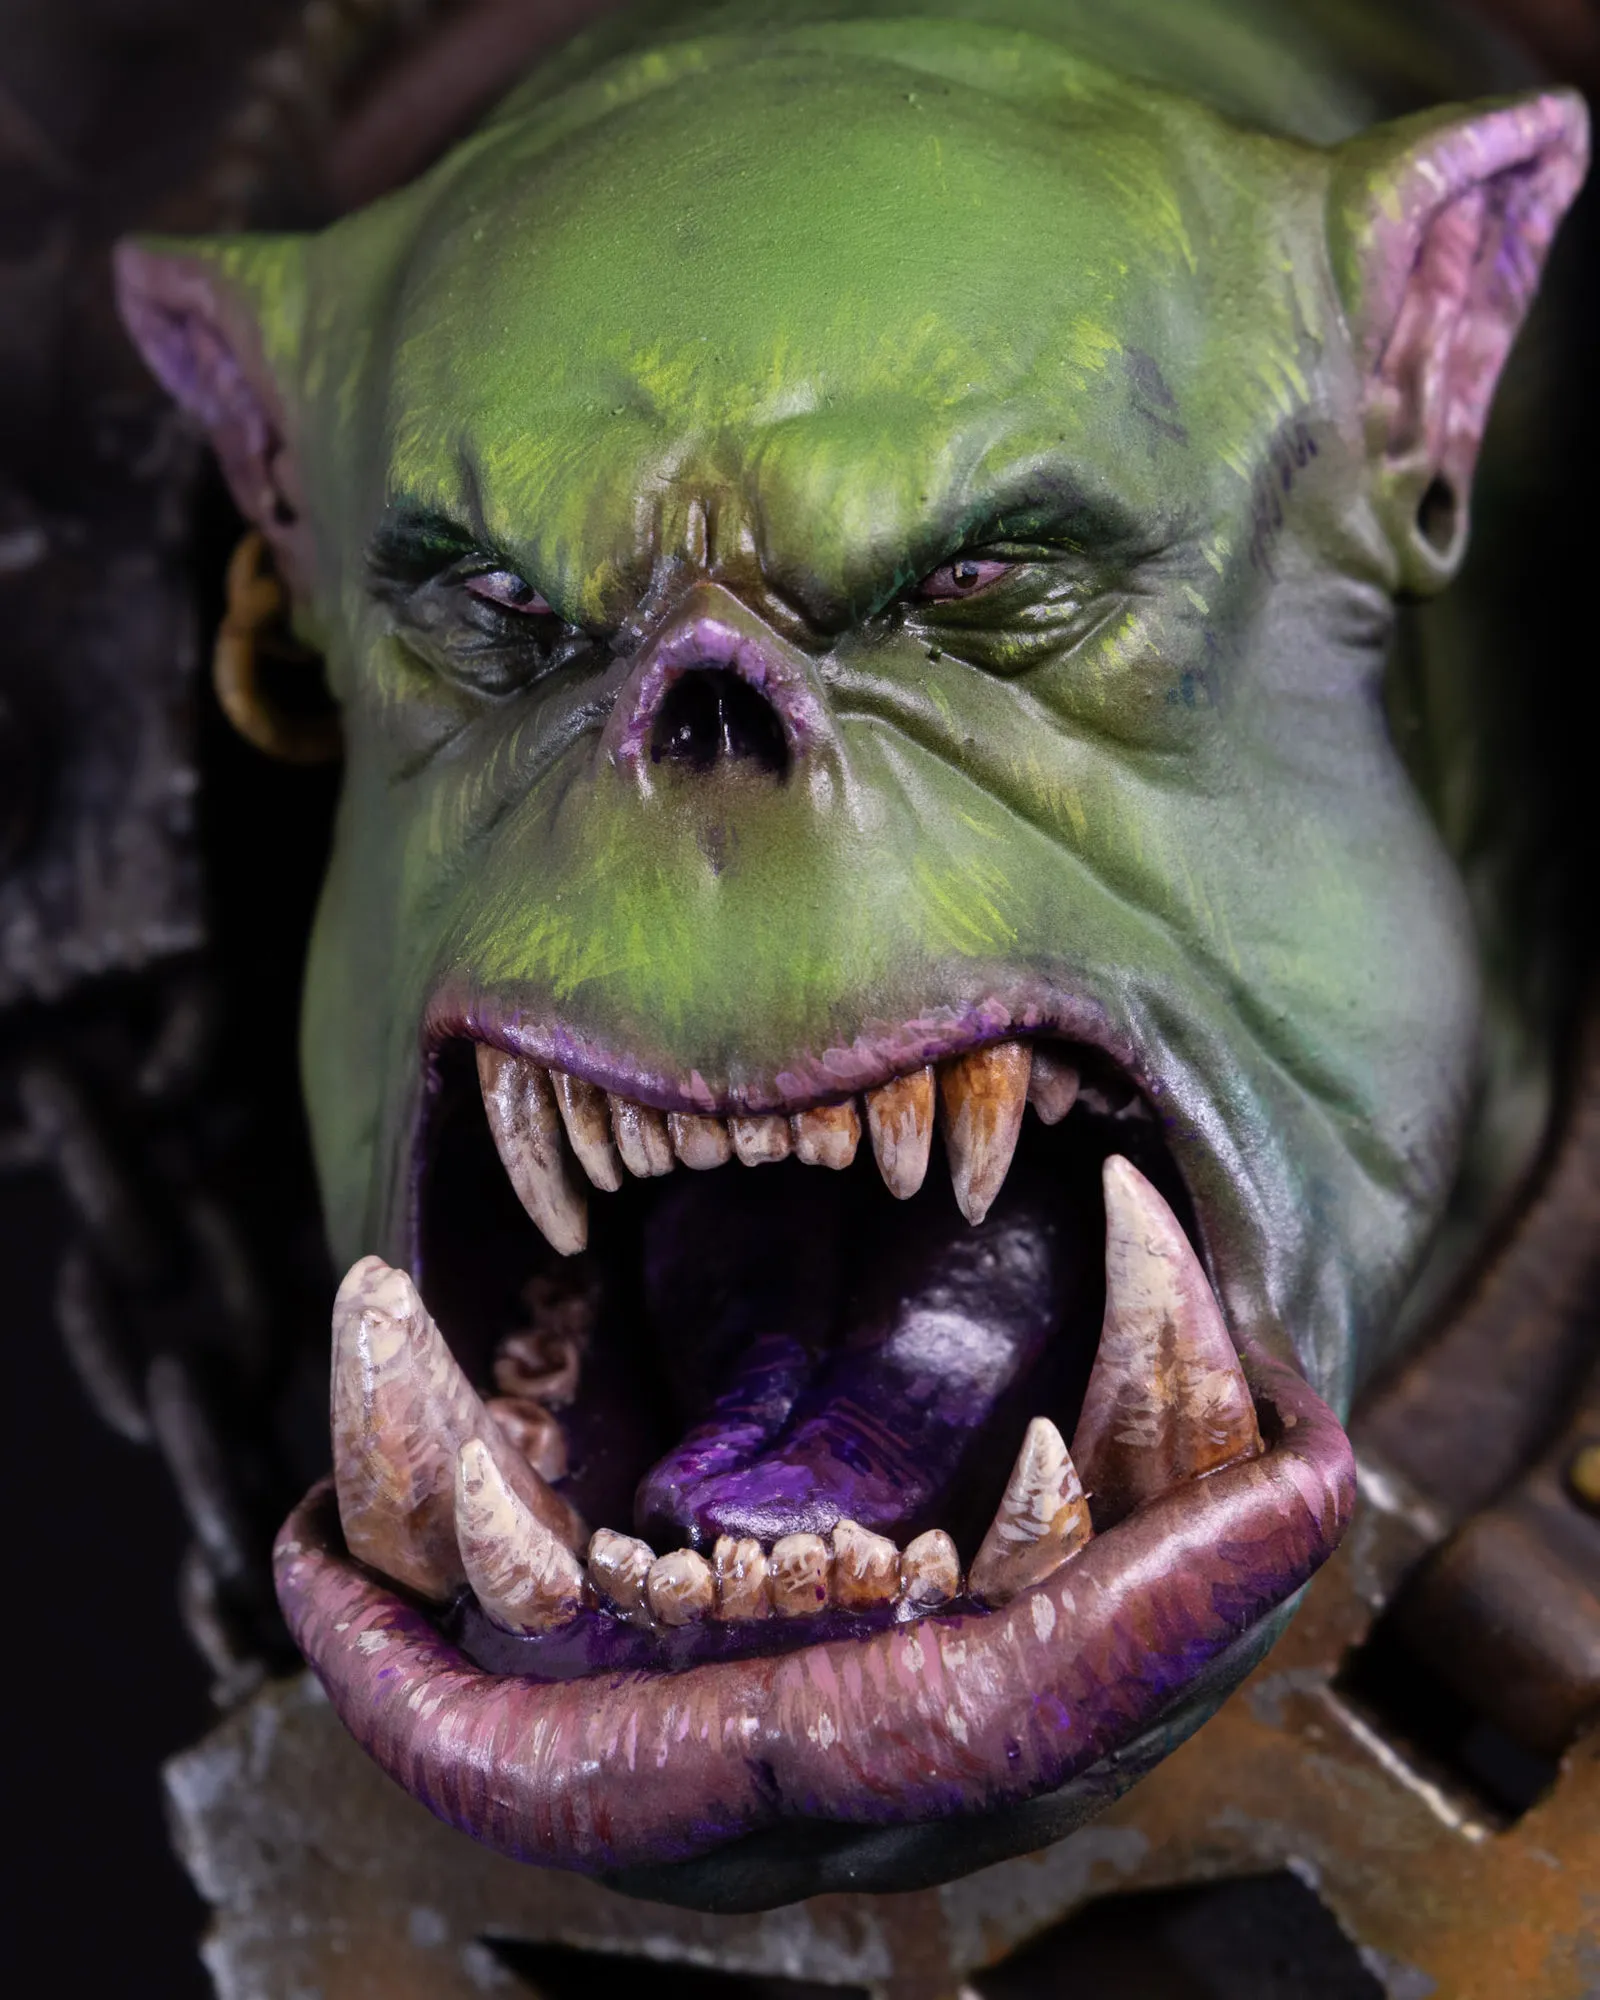
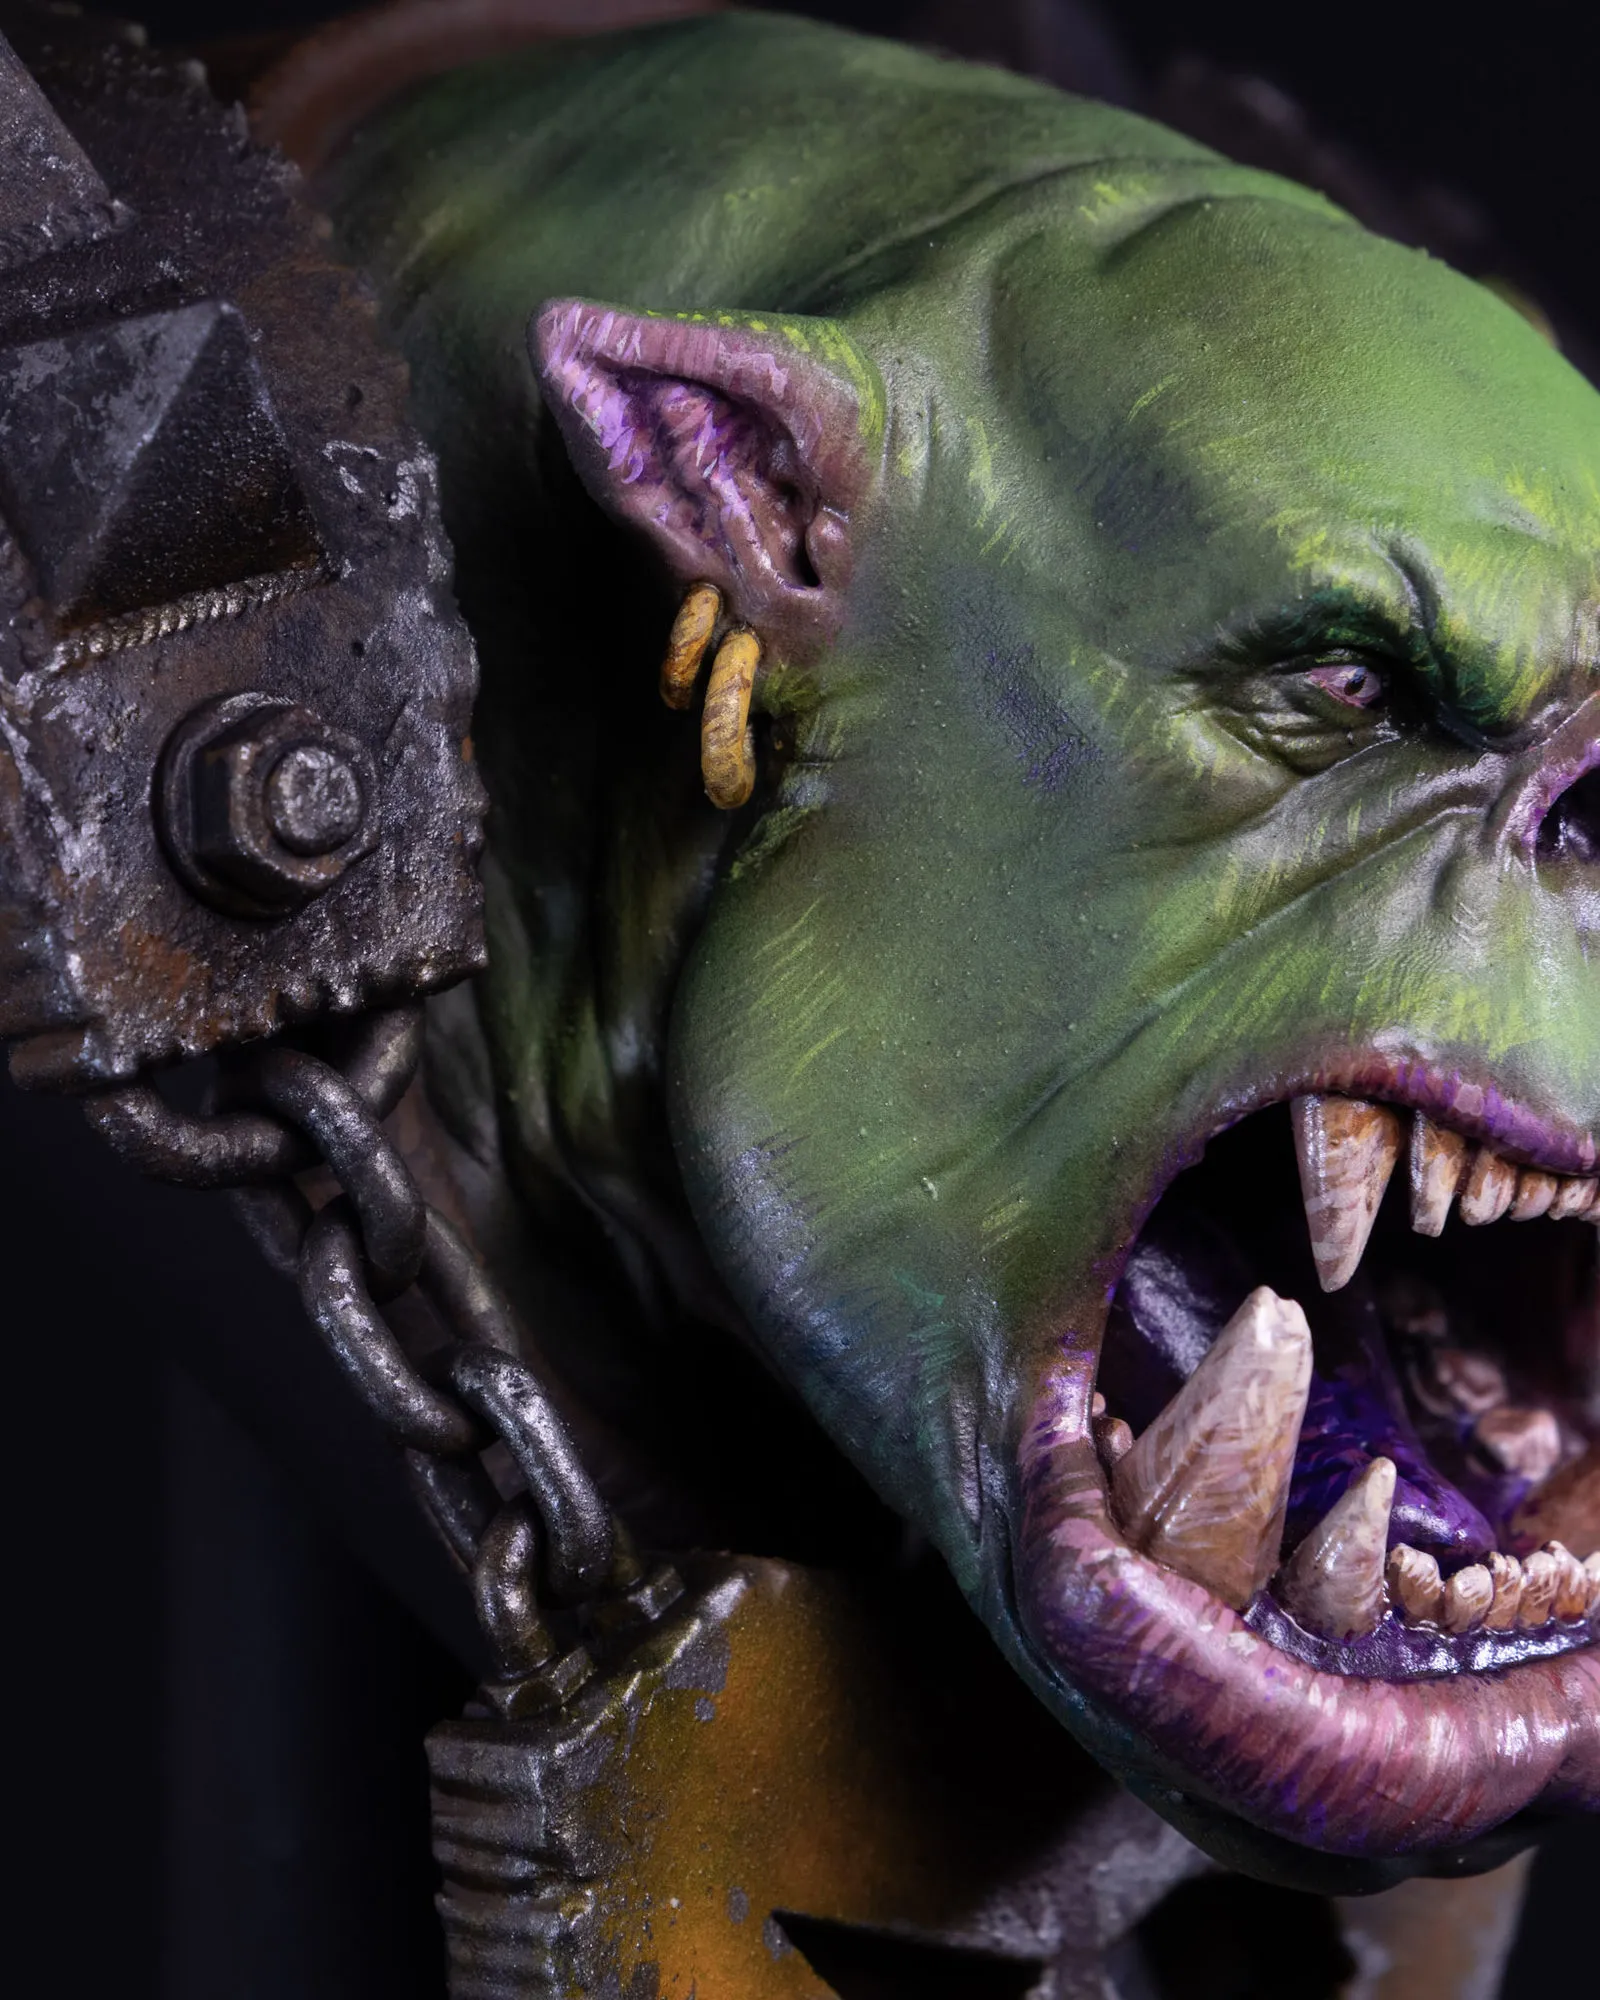
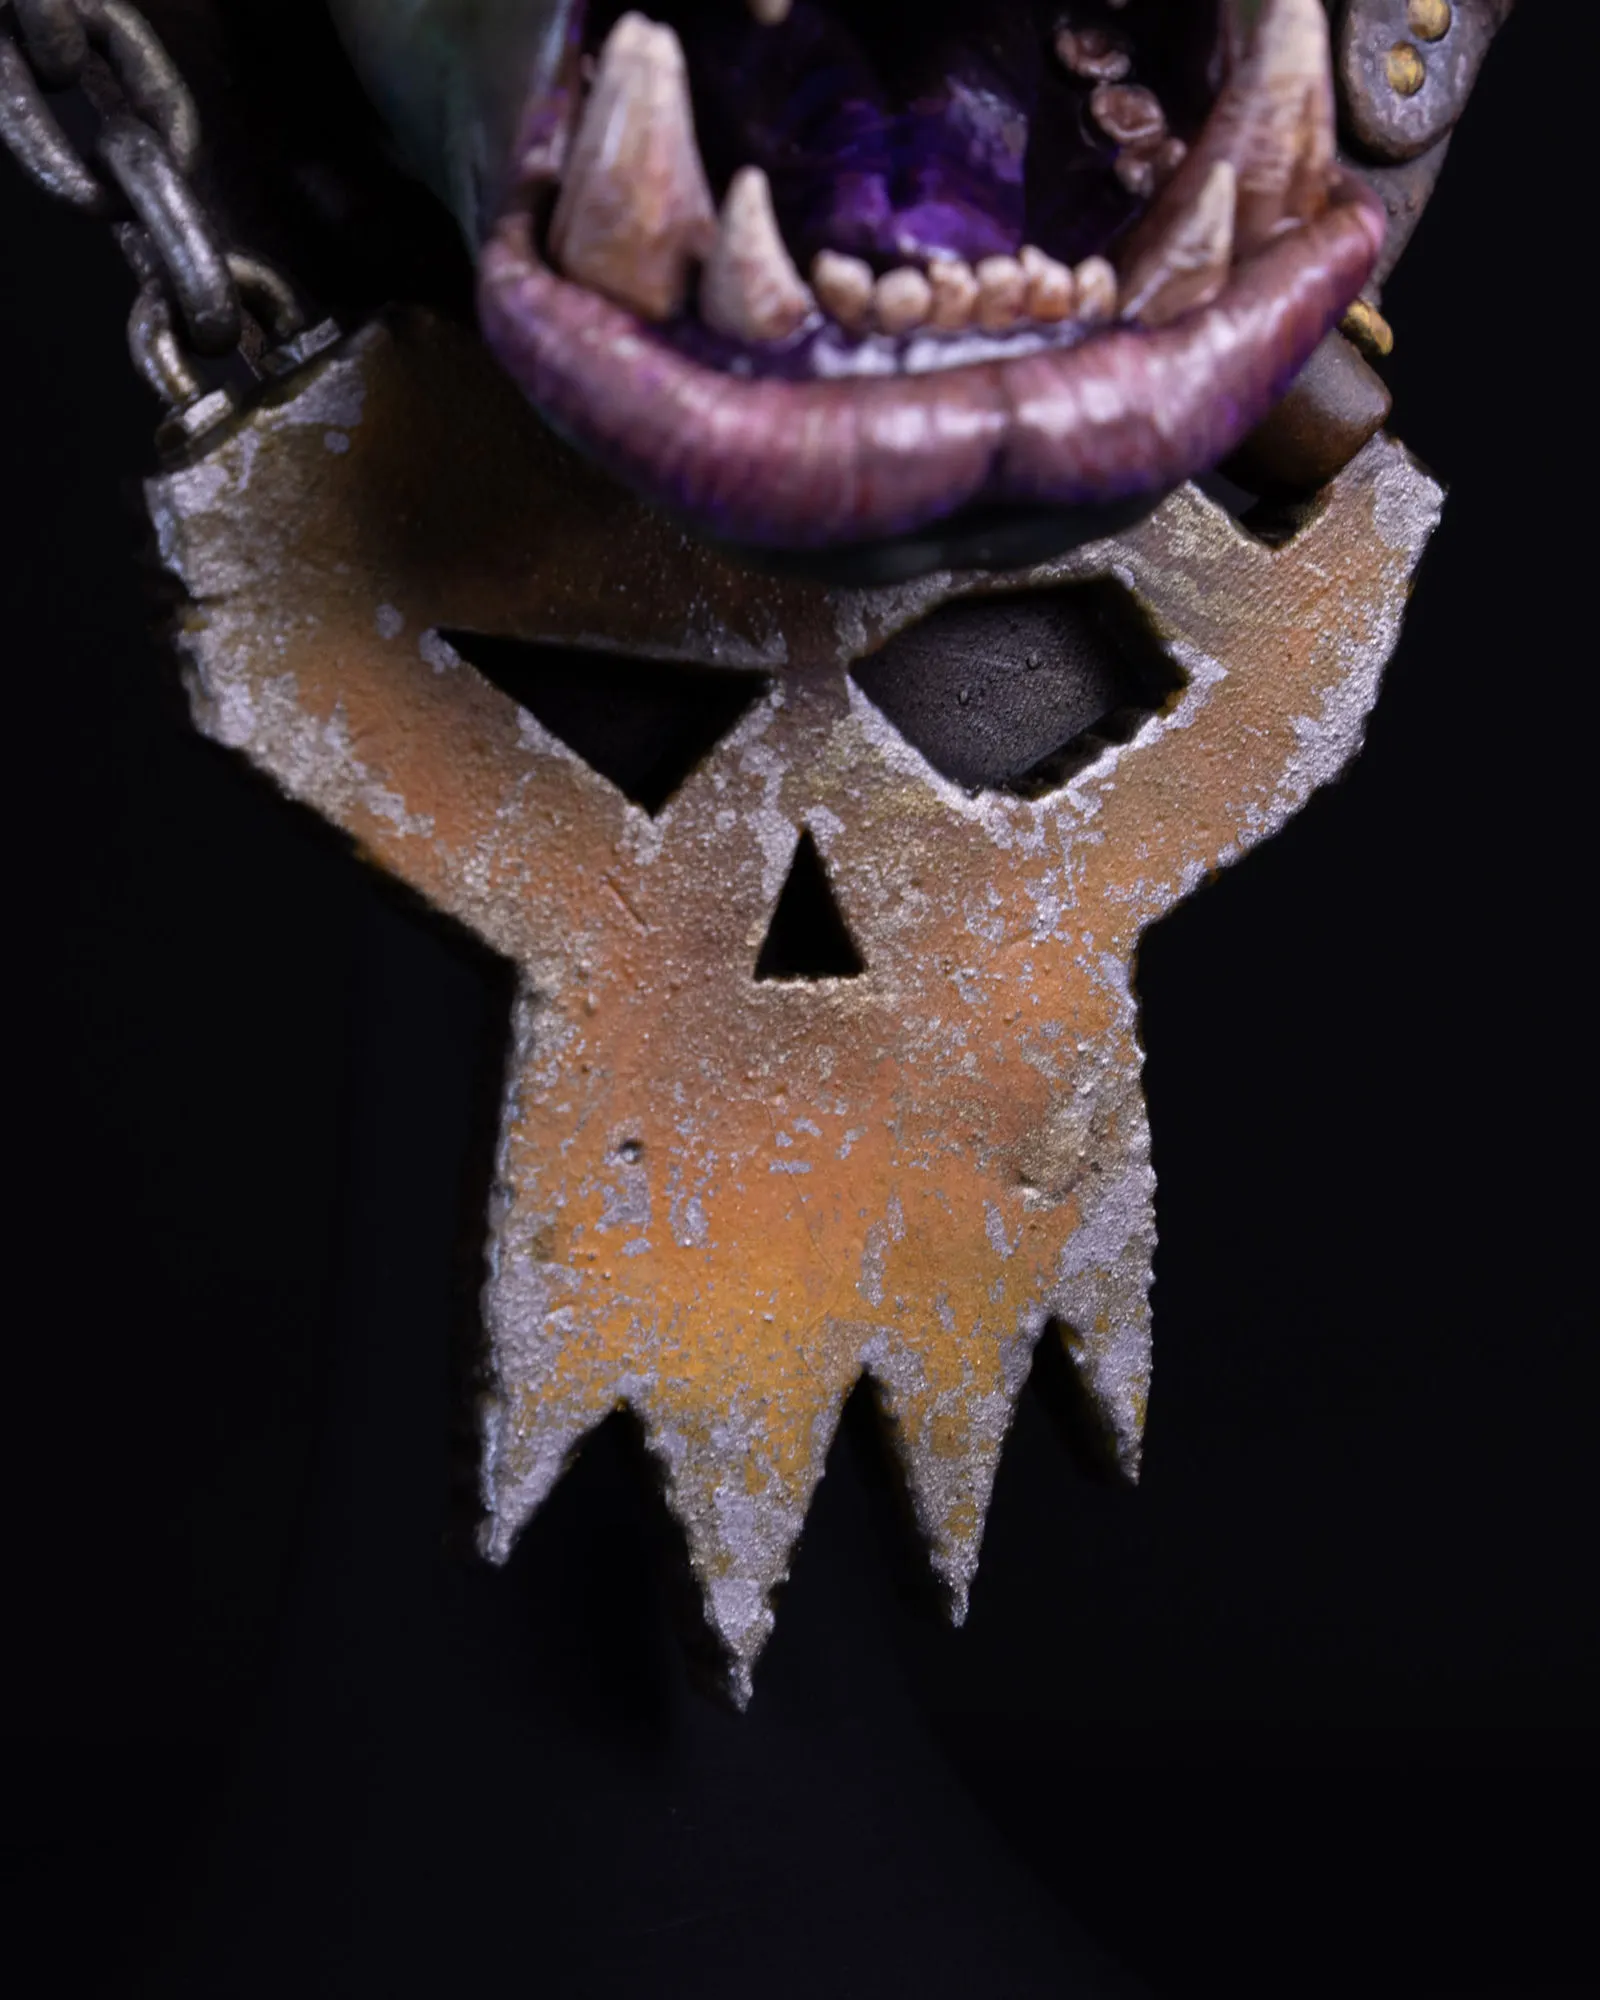
What I figured out was that I wanted strong top-down light hitting his brow, cheekbones, and upper teeth. I wanted the mouth to fall into deep shadow so the teeth would catch light against a dark void. The metal armor and skull plate at the bottom would sit in cooler, less saturated light so they wouldn’t fight with the face for attention.
I was also using this as an excuse to learn my camera better. First time shooting full manual, playing with aperture and exposure to get the moody lighting I wanted. The reference photos themselves were kind of a project.
Painting the Values
Once I knew what the lighting should do, I airbrushed the values onto the model. Black primer, then progressively brighter zenithal passes of white ink to bake in the highlights I’d planned.
I went harder on the contrast than I usually would. Bright highlights on the brow, the bridge of the nose, the upper teeth. Bright enough that it looked almost exaggerated before any color went down.
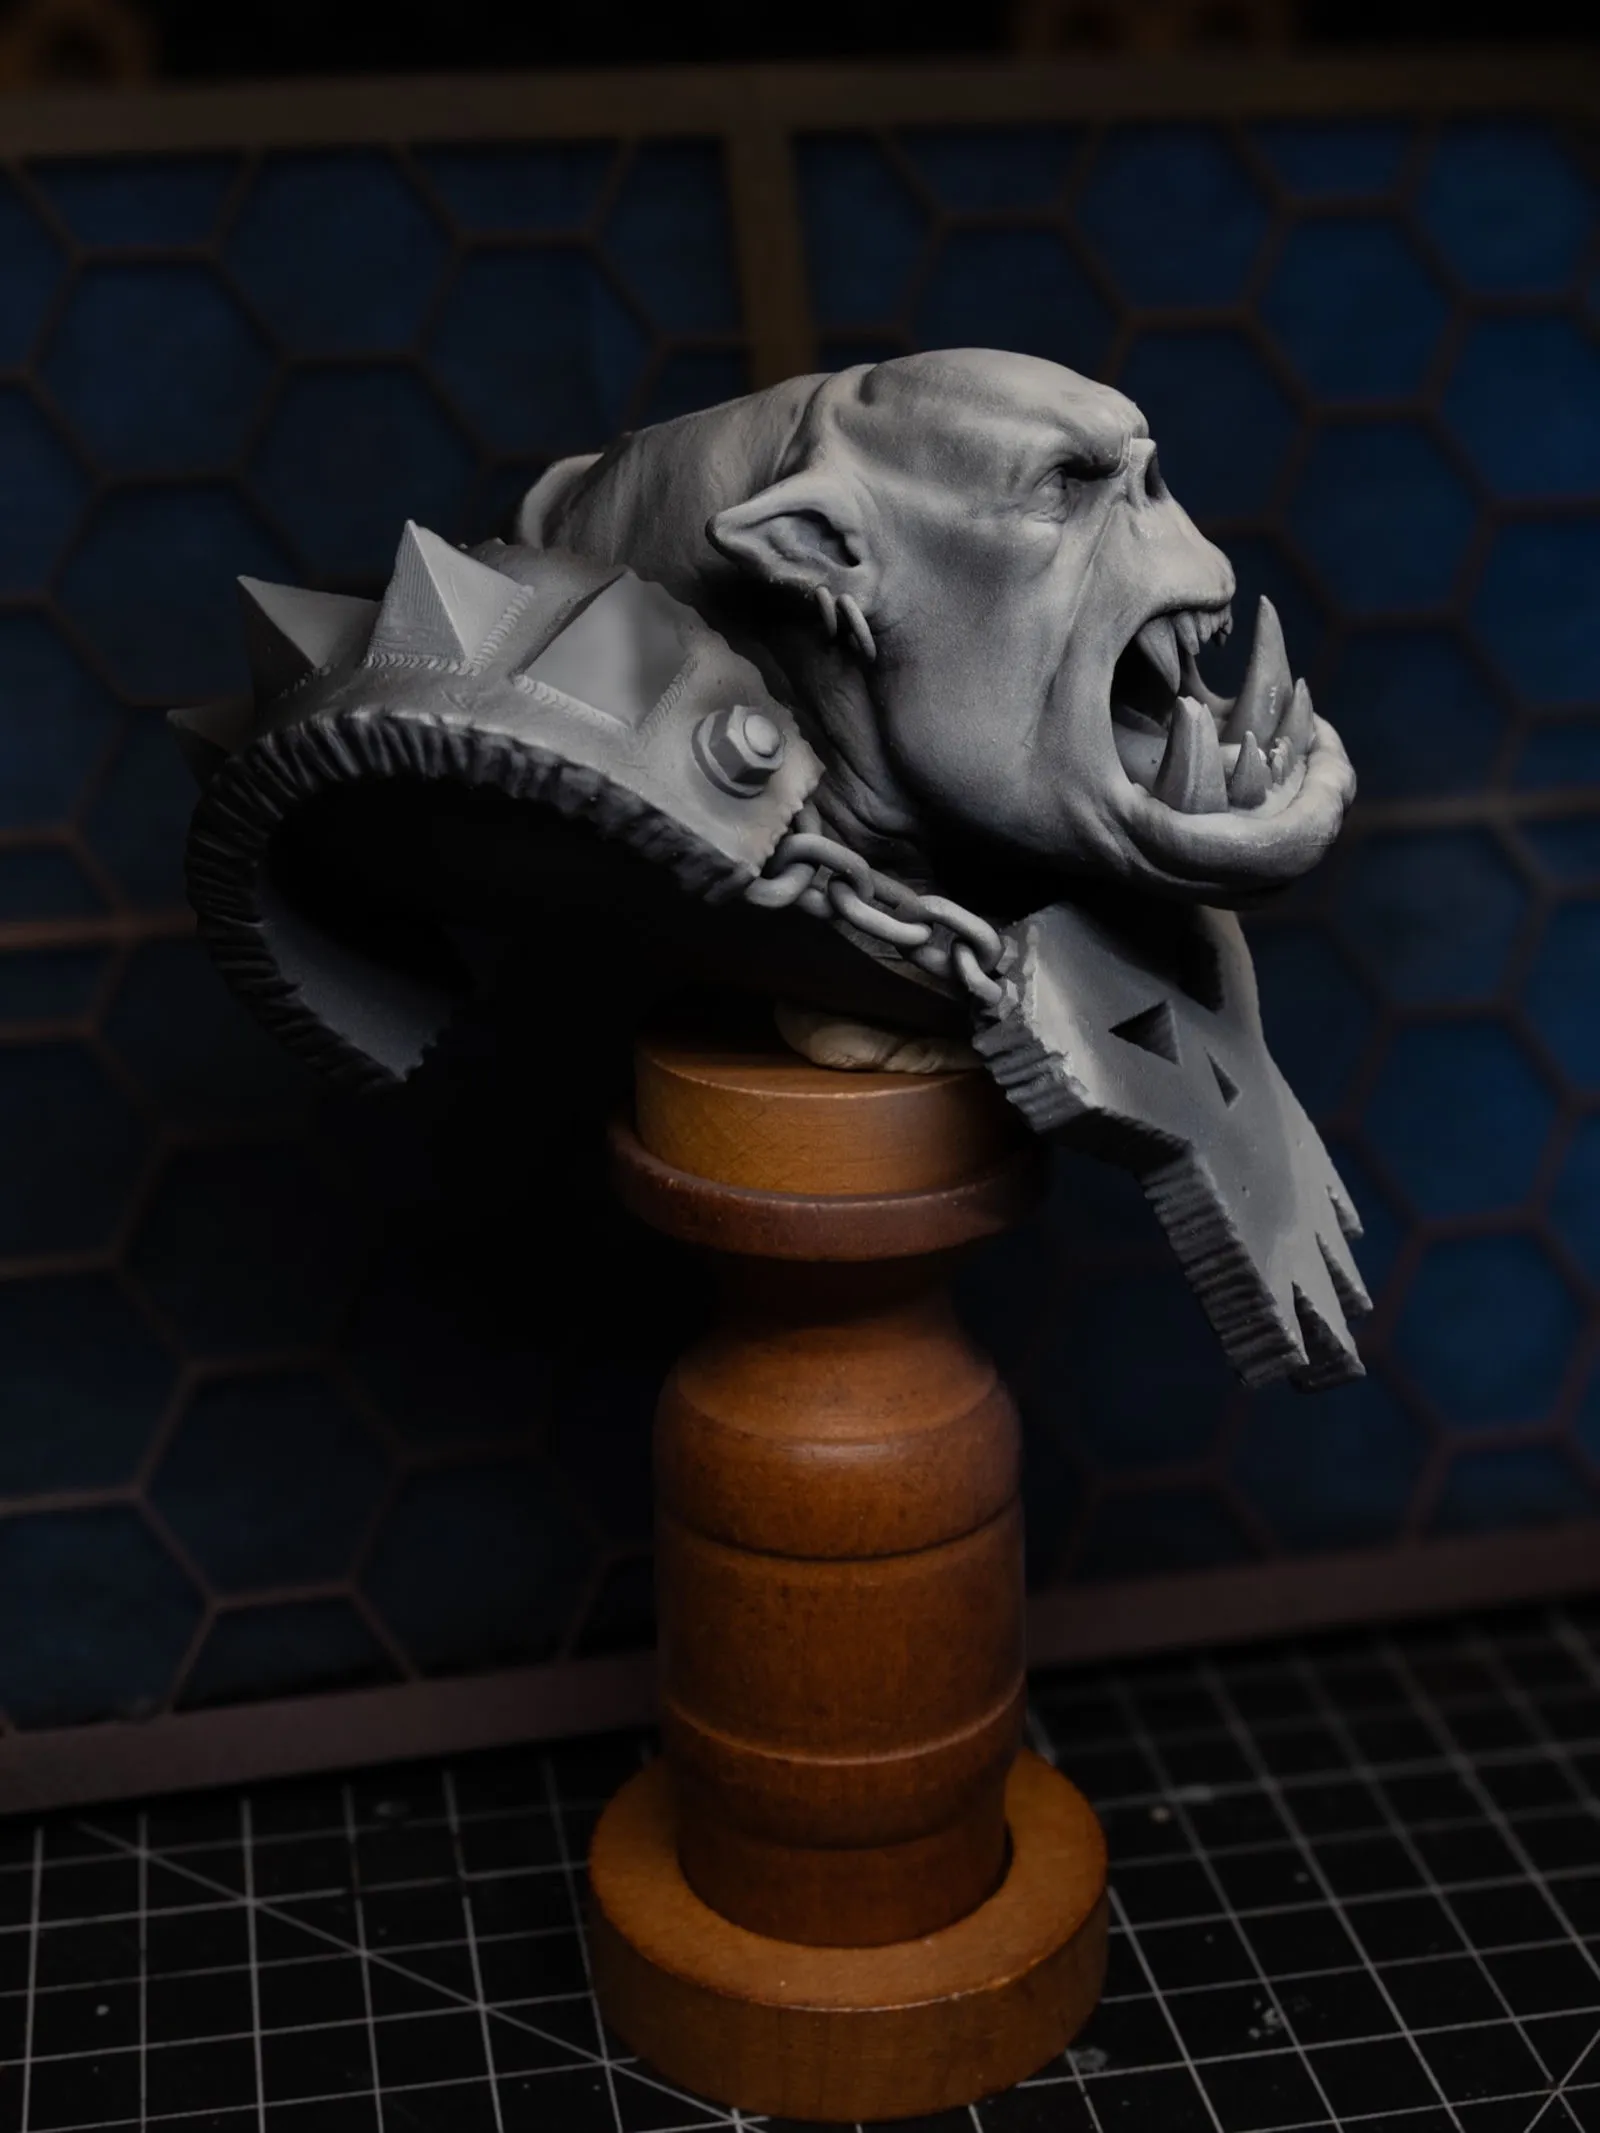
This was the part that taught me the most, I think. The strong contrast at this stage made everything that came after easier. When I started laying in color, I wasn’t trying to invent shadow and light from scratch. I was painting on top of a piece that already had structure. Big difference.
Color
For the skin I went green, but pushed it more acidic than typical Ork green. I was looking at poison dart frogs and reef fish more than other miniatures. Bright greens with yellow pulled through the highlights, purple settled into the shadows.
The purple in the lips, ears, and around the eyes is what I’m most happy with. It’s not realistic. Real Orks don’t have purple lips. But it sells the idea of bruised, alive flesh in a way pure green never could. Skin with blood under it.
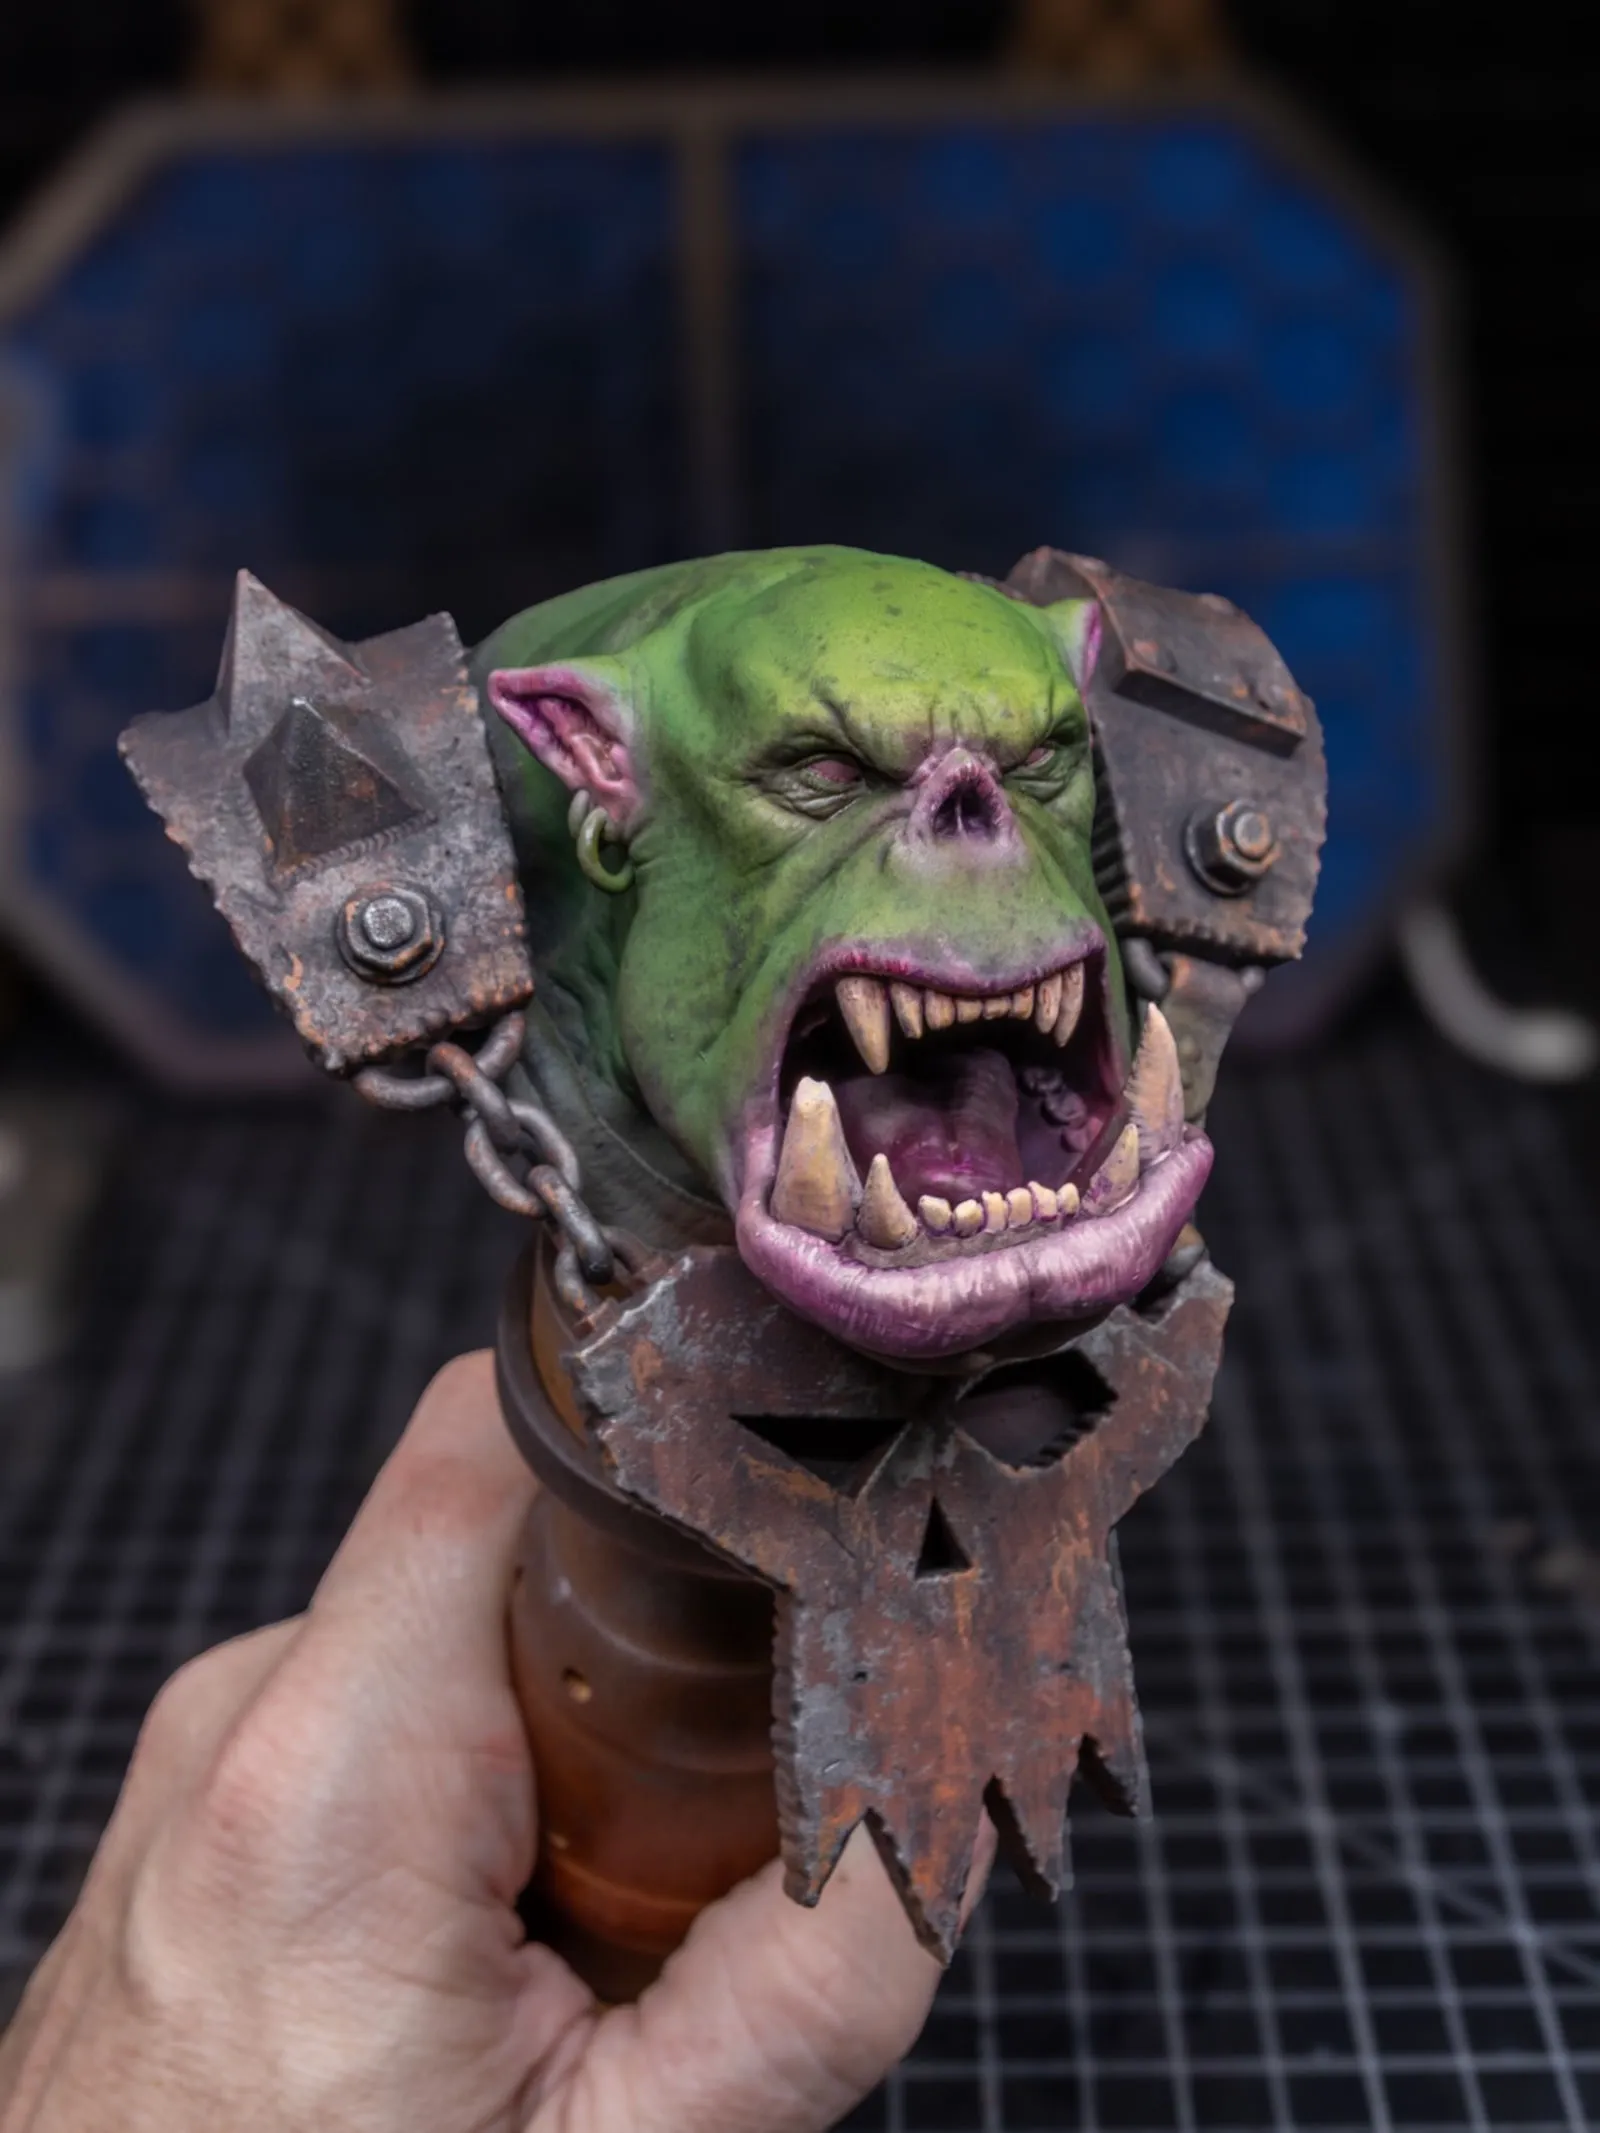
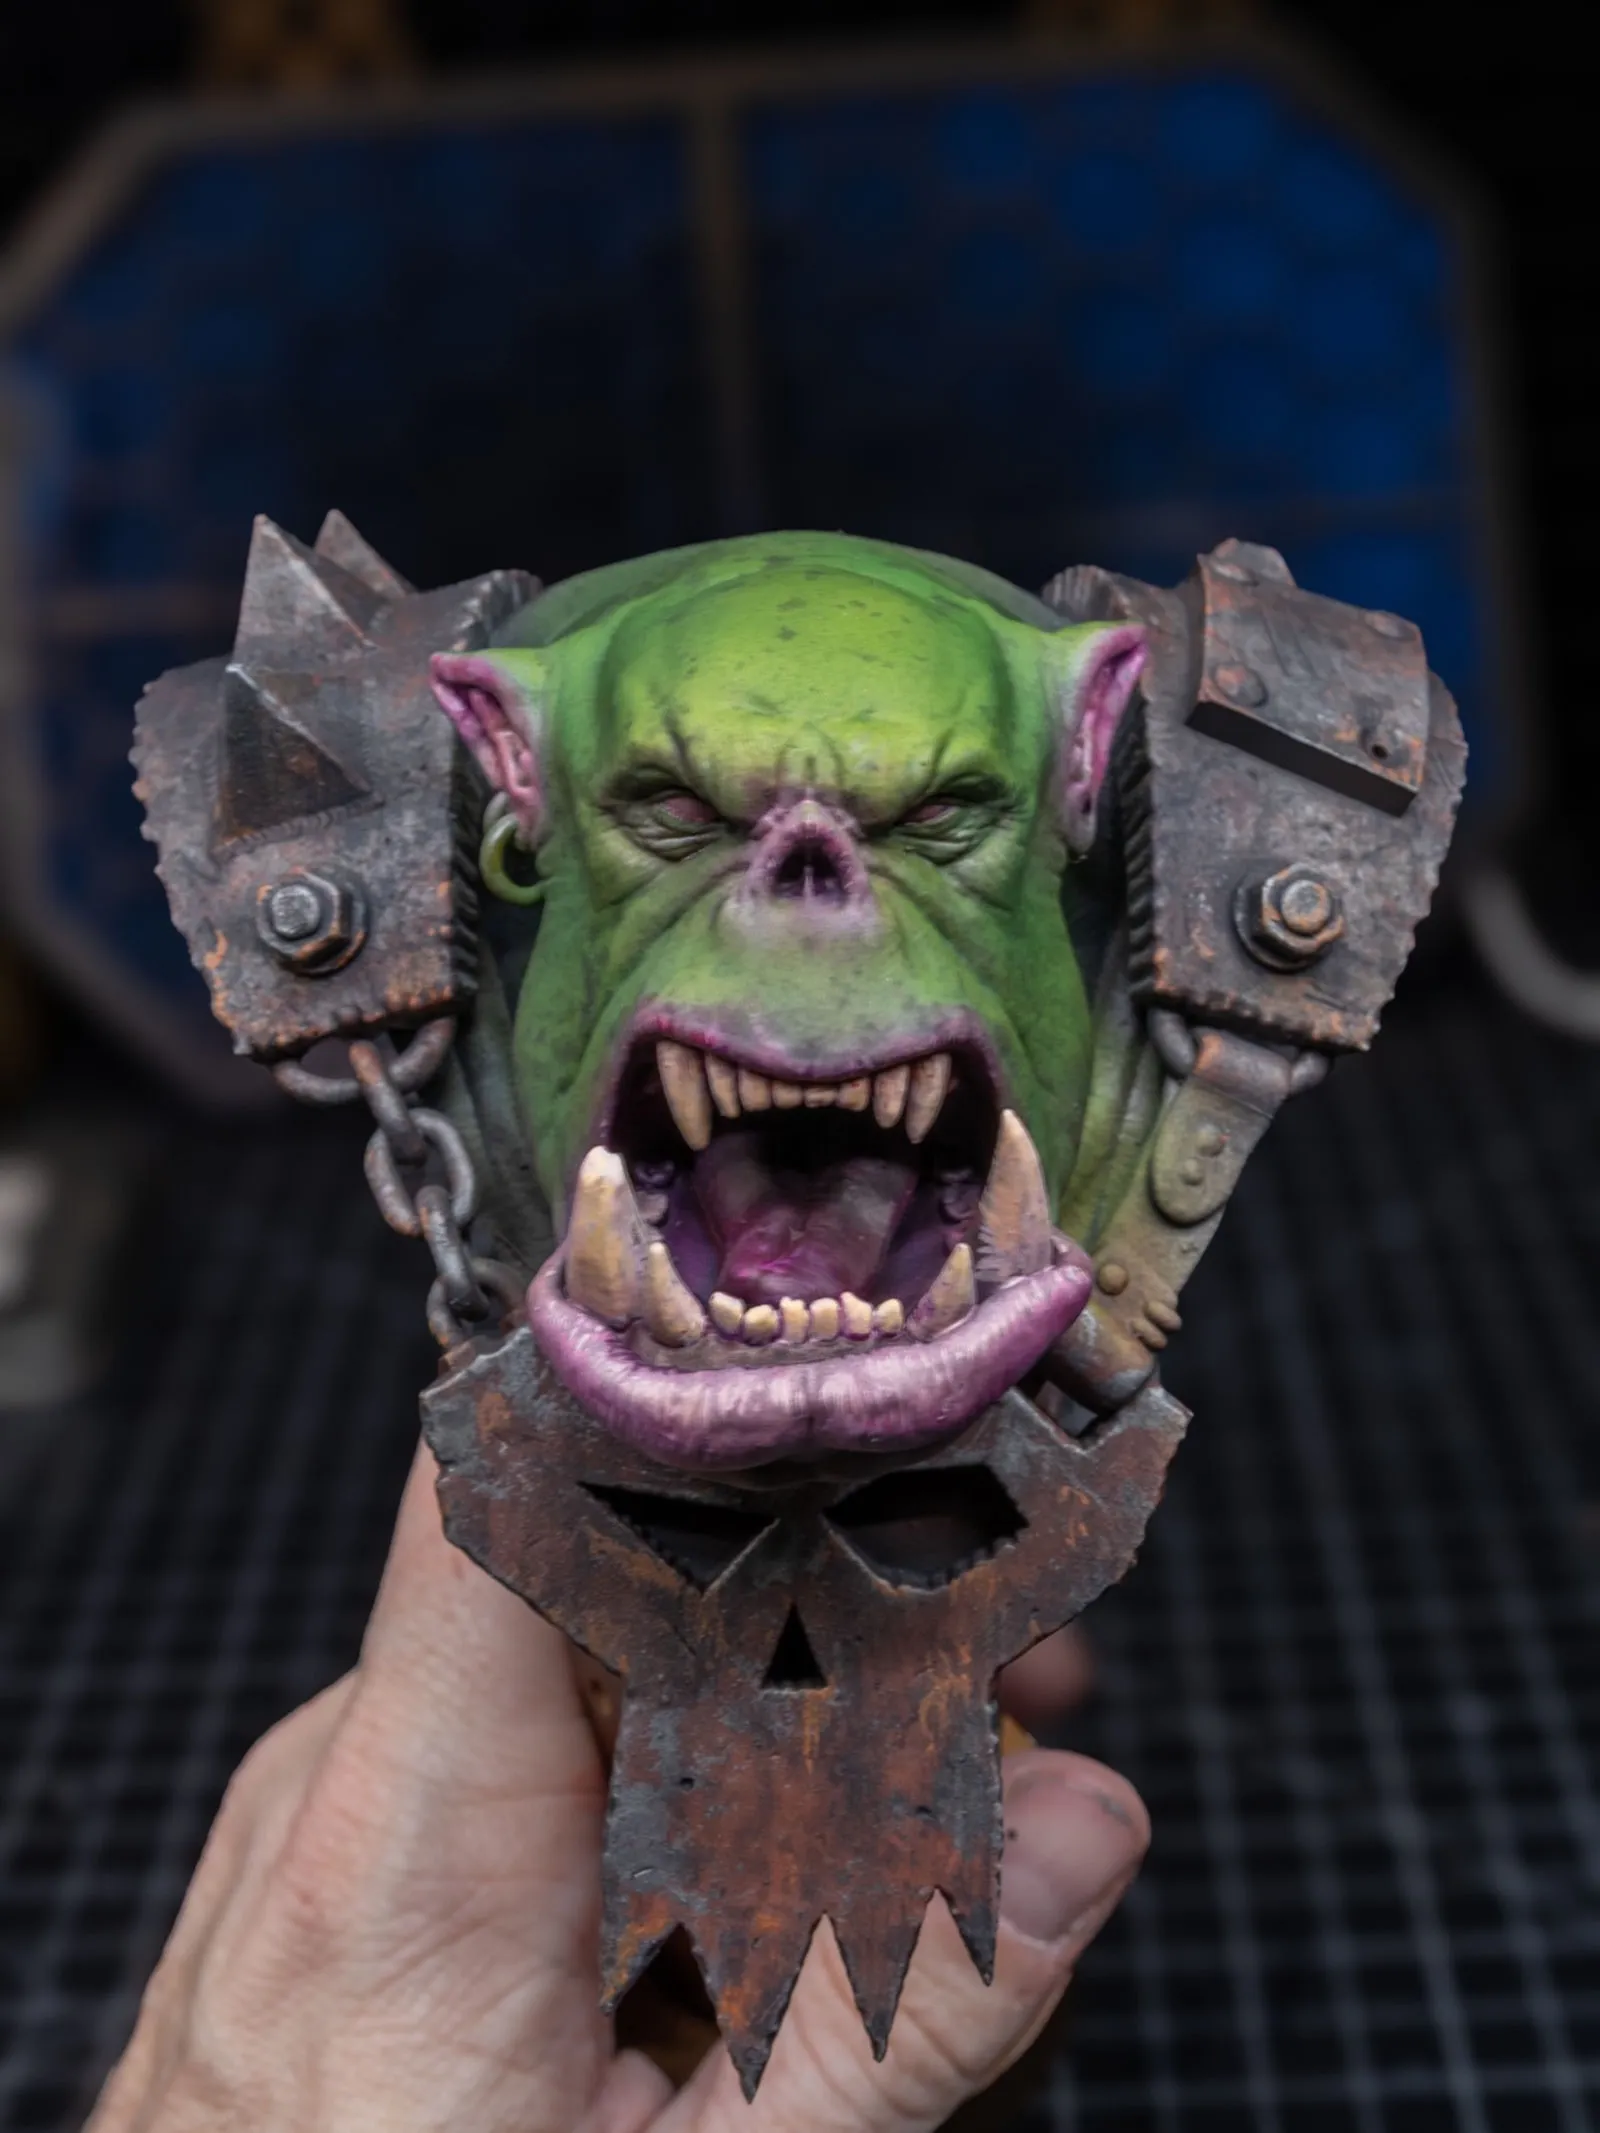

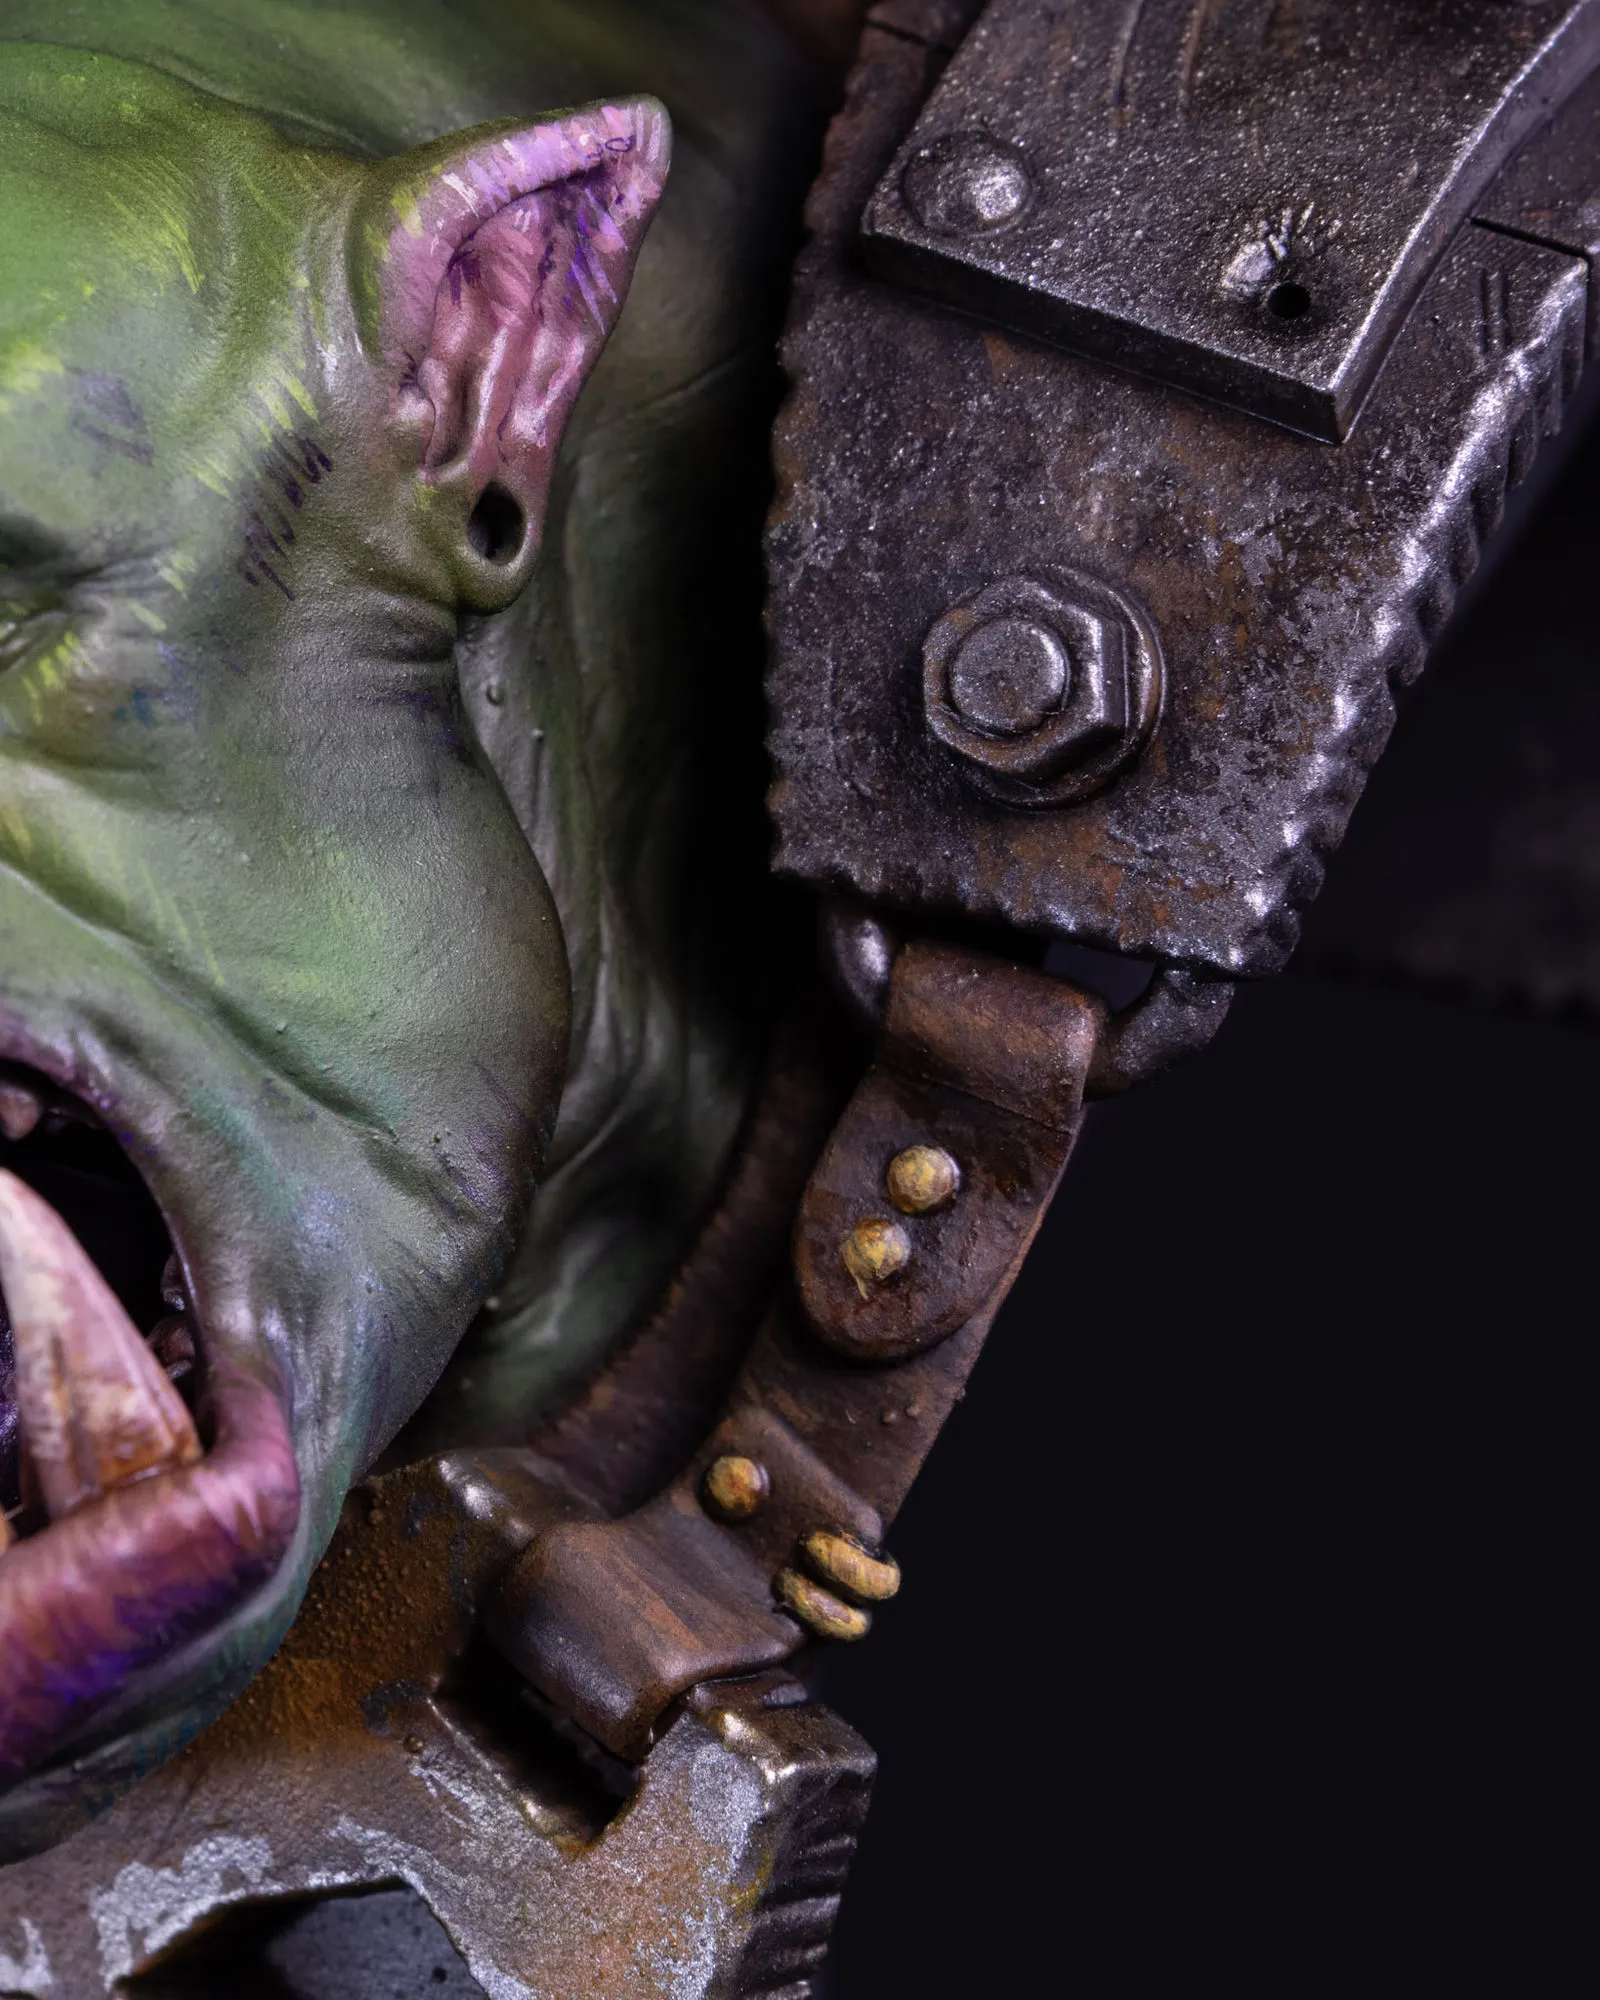
The metal armor went the other direction. Cool, desaturated, weathered. The skull plate at the bottom got pushed into proper rust because I wanted that warm orange against all the cool green and purple above it. Without that temperature break the whole piece would have felt monochromatic.
The Brushwork
Here’s the thing I’ve been avoiding. I usually try to blend my brush strokes away. I’ll airbrush something smooth, then if I have to use a brush I try to make it look like I didn’t. Clean, neat, no marks.
But the painters whose work I love most, you can see their hand in everything. The brush isn’t hiding. It’s part of the texture. Part of the character.
So I made myself leave the strokes visible on this one. Vertical strokes on the cheeks and forehead. Texture work on the lips. Brush character in the teeth. Didn’t blend it away. Just left it.
It feels uncomfortable at first because it goes against the impulse to make things look “finished.” But the piece reads more alive than anything I’ve painted before. The brushwork gives the skin a sense of being a real surface instead of a smooth coated thing.
I’m going to keep pushing this on future pieces. Probably further than I did here.
The Mouth
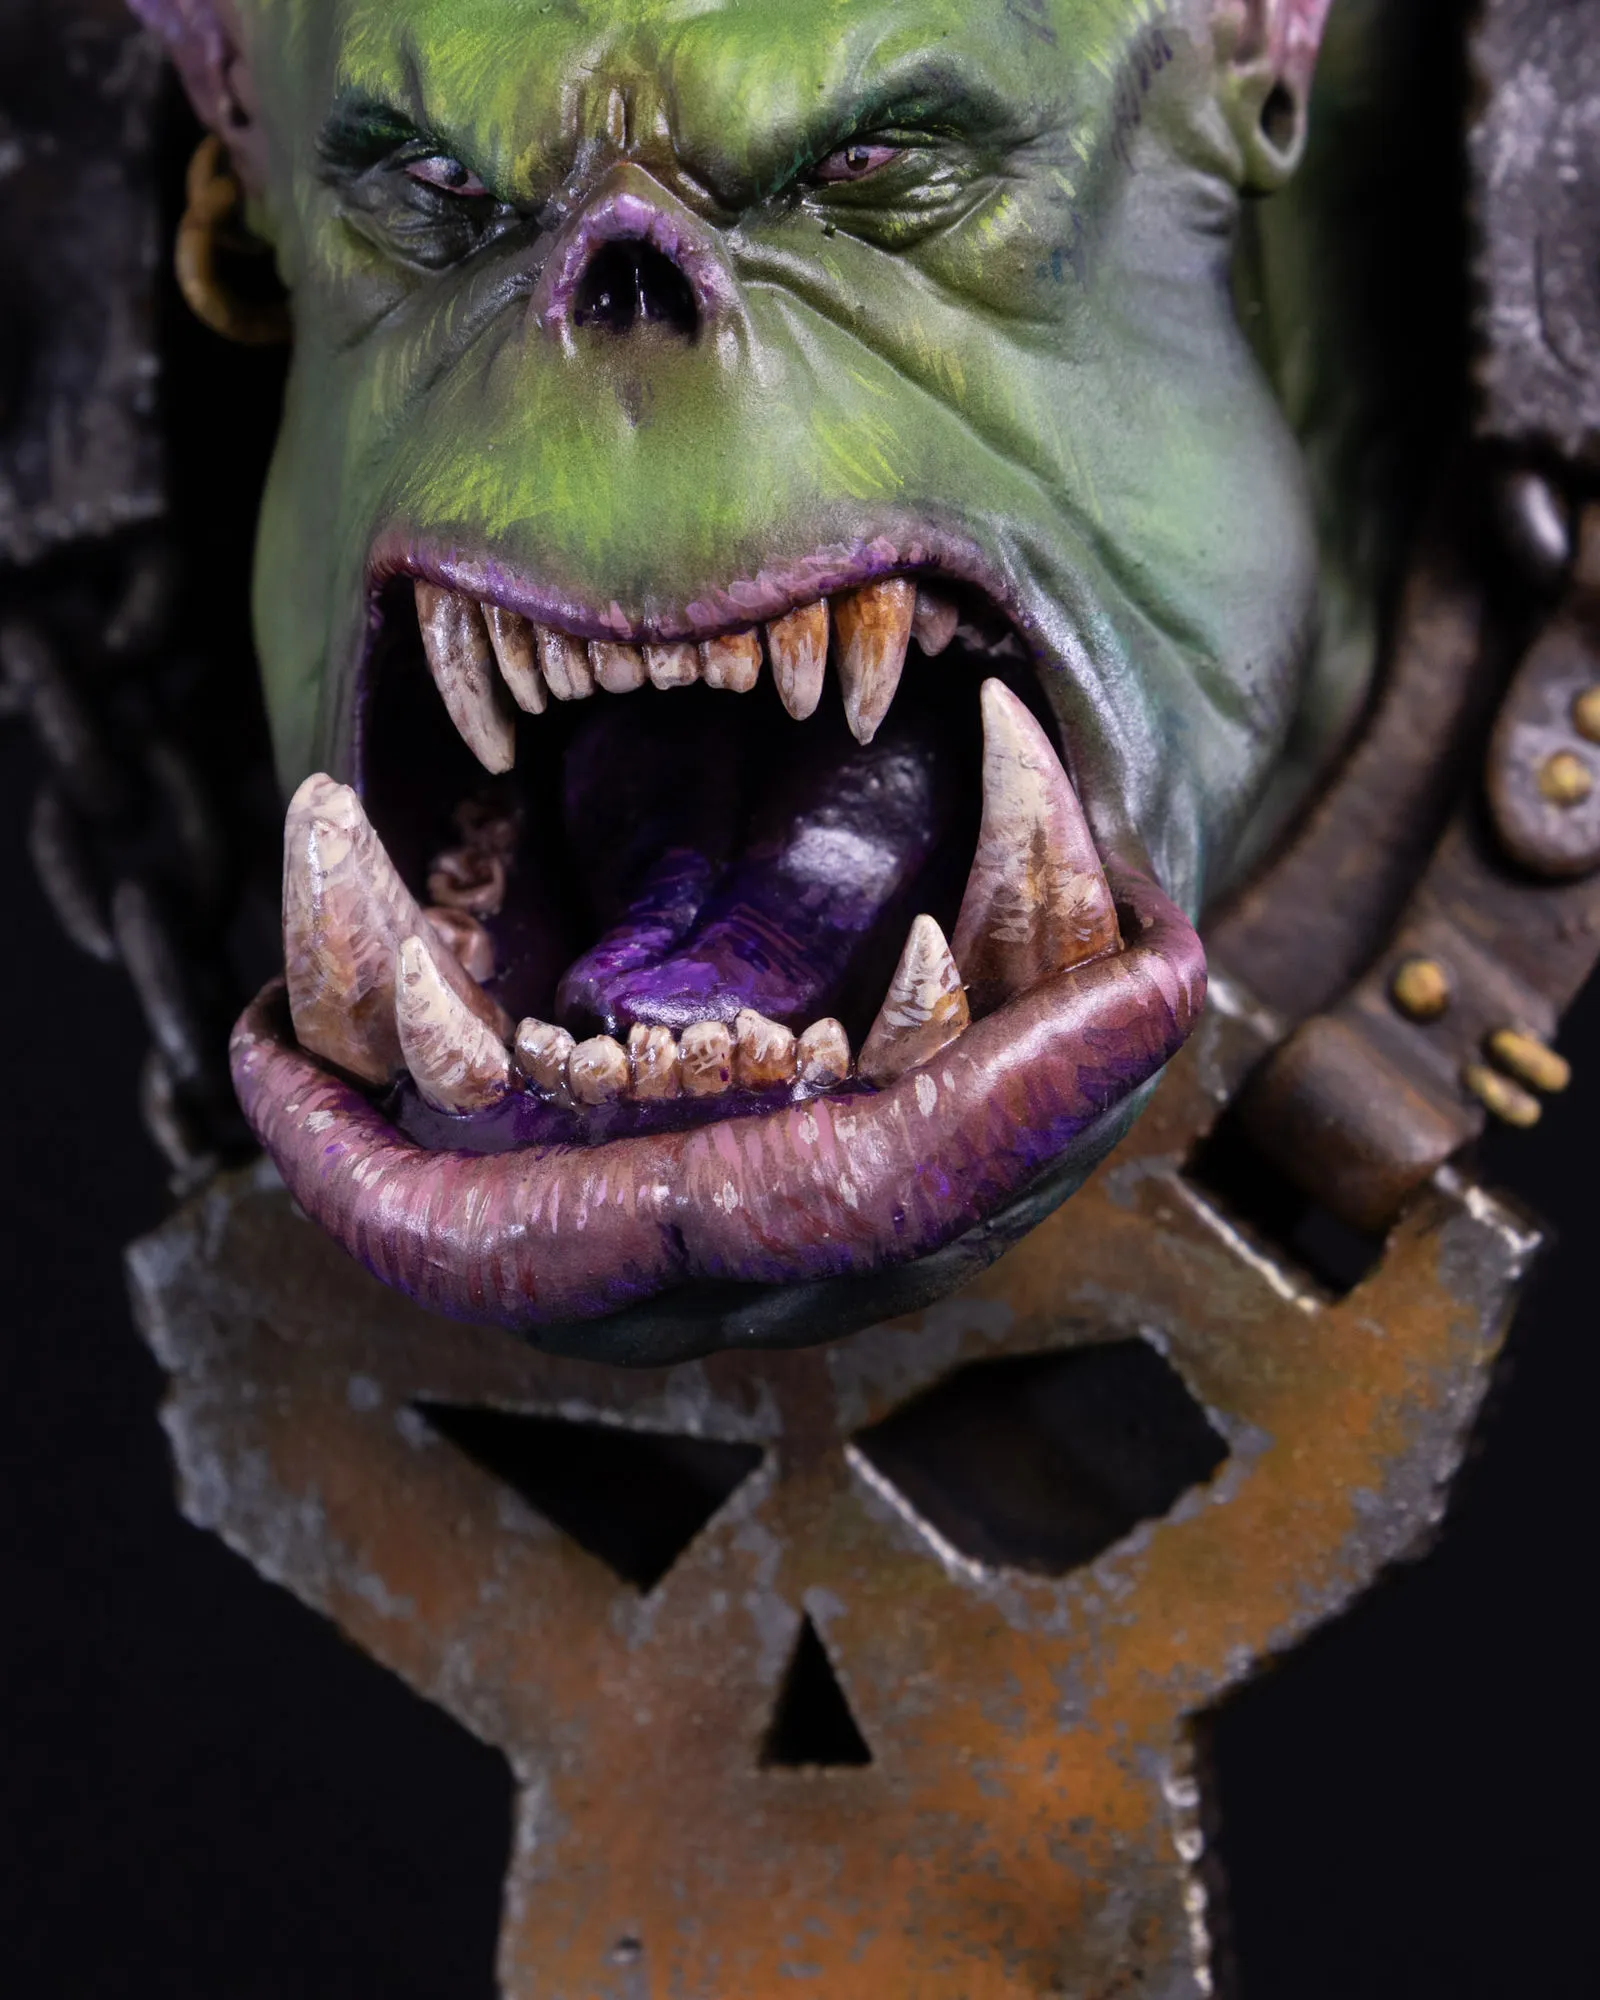
I ended up spending a lot of time on the mouth. The lips went through a gradient of dark purple at the corners, into pink and magenta in the middle, into a glossy near-black inside the maw. The wet shine was a gloss medium glaze over the deepest shadows.
Every tooth got painted individually. Staining at the gums, yellowing toward the tips, gradients on the larger tusks. The tongue got a gloss treatment too. The whole mouth was its own little project.
The Struggle Phase
There were a few sessions on this one where I felt stuck. The “this is bad and I don’t know how to fix it” feeling. I think every painter knows it.
What helped, weirdly, was photographing the work. Stepping back and seeing it through a lens gave me enough distance from the details to notice what was actually working. Things that felt wrong up close looked fine in a photo. Things I’d convinced myself were great needed more work.
I’m going to remember that. The camera as a second set of eyes.
What I Want to Try Next
A second light study on this same piece. Now that he’s painted, I want to see what happens with colored reflected light. Warm light bouncing up from below into the shadows. Cool light from a different angle. Push the lighting further than just the zenithal.
I’m also curious what happens when I push the brushwork even further on the next piece. There’s a Darksiders War sculpt waiting for me that I’ve already started a light study on. That’s probably where this thread continues.
Credits
Sculpt by Escuig Miniatures. Their work is fantastic. Highly recommend checking it out if you don’t know it.
If something here connected or you’ve been working through similar things, I’d love to hear about it.